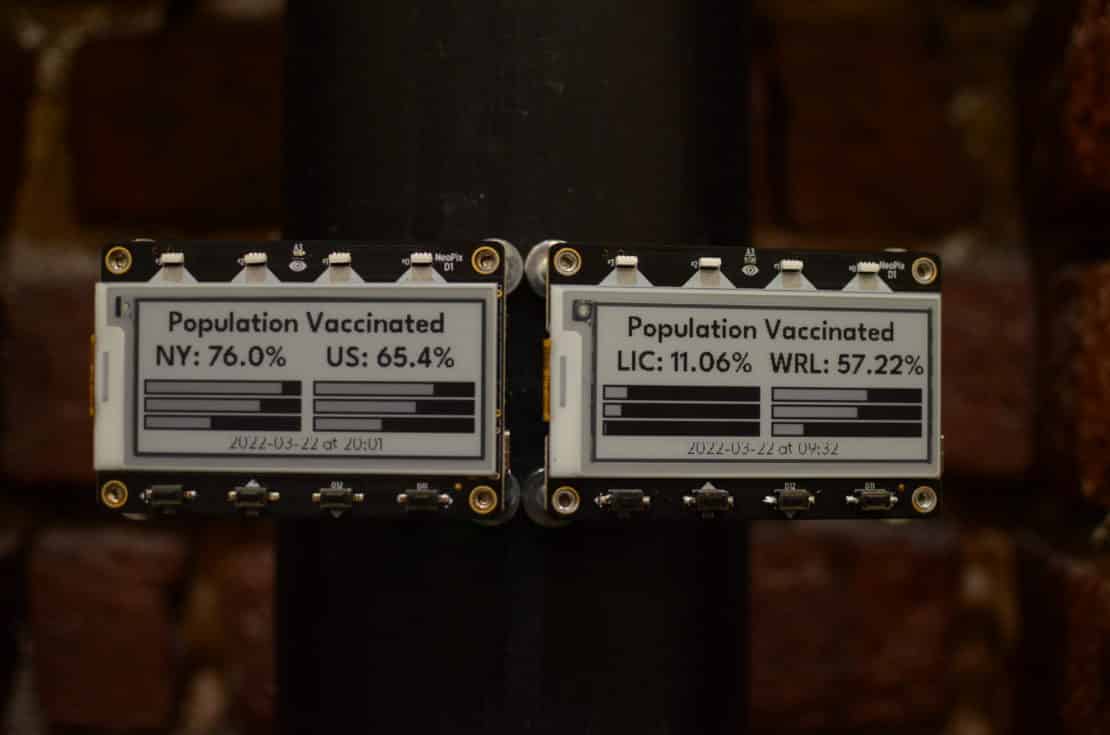
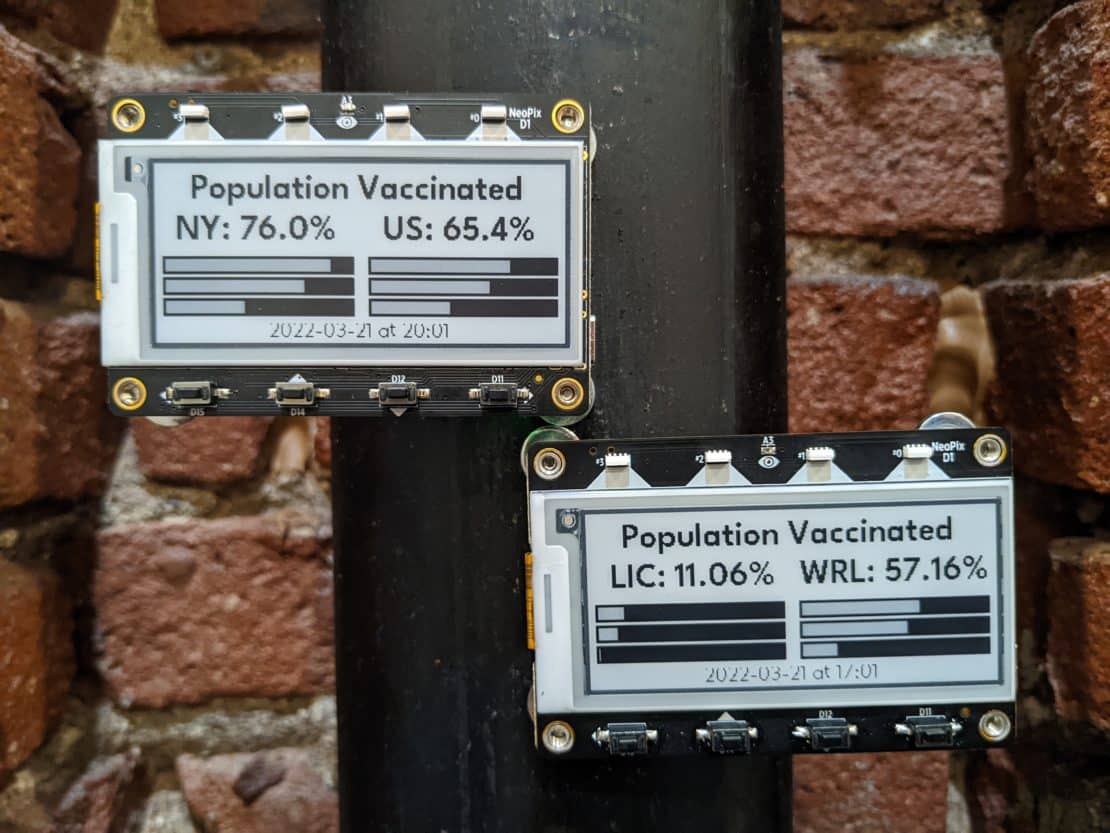
I’m a major fan of the ESP32-S2 platform of low-power, low-cost, Wi-Fi capable microcontrollers. Adafruit specifically sells a variant that features a 2.9′ E-ink display and Python support, called the MagTag. I’m not ashamed to admit I have *far* too many of these things littered across my apartment.
One of my favorite organizations is Our World in Data (OWID). They work with thousands of researchers to make research and data accessible to the public. In particular, I’ve been closely watching their repo that tracks COVID vaccination rates. As numerous worldwide agencies update their vaccination rate metrics, OWID consolidates that data into a single JSON file.
The combination of the MagTag and OWID’s data set inspired my first project as the newest member of Docker’s DevRel team. I decided to turn the MagTag into a display for the specific OWID I’m following. However, I ran into a few problems while getting started.
OWID uploads its JSON data collection to GitHub as a raw JSON (or CSV) file, rather than serving it over an API endpoint. The total payload is also 34MB. While that doesn’t seem huge, the MagTag itself has just 4MB of flash storage and 2MB of PSRam. That’s nowhere near enough memory to parse all that data. Luckily, I commandeered a few spare Raspberry Pi’s to create a data processing layer. Using Python, I’m able to spin up a quick Flask server to process the image—and because of Docker, I can deploy a containerized service to my Raspberry Pi in just a few seconds.
My Pi pulls an image built for Armv7 from Docker Hub. That container creates an API endpoint that’s accessible on my local network. From there, the MagTag can request a country’s data from the Pi. The Pi grabs the most recent JSON file from OWID, pulls out just the information the MagTag is looking for, and then passes it along. This method reduces the data payload from 34MB down to the KB range, which is much more manageable for an IoT device.
That said, let’s dive into the code.
Coding Your Solution
If you’d rather just read the code, head over to GitHub or Docker Hub for deployment instructions.
Data processing
Knowing that the Raspberry Pi’s data processing function would be pretty lightweight, I decided to spin up a Flask server—taking advantage of Flask’s built-in ability to handle JSON with jsonify. The requests library for grabbing our data from OWID was also pretty handy:
from flask import Flask, jsonify
import requests

app = Flask(__name__)
For this project, I only need two routes. One to act as a health check to confirm the API is online.
# Setup a health route to check if the service is up
@app.route("/")
@app.route("/health")
def hello():
response = jsonify({"status": "api online"})
response.status_code = 200
return response
Secondly, and more importantly, is your route to hit the OWID dataset. This route parses the 34MB JSON file for the requested ISO code, retrieves the most recent data, and formats it for the Raspberry Pi:
# Setup a GET route for requesting the data of the requested ISO Code.
@app.route("/iso_data/<iso>", methods=["GET"])
def iso_data(iso):
# Get the OWID Data from GitHub
vaccination_url = "https://raw.githubusercontent.com/owid/covid-19-data/master/public/data/vaccinations/vaccinations.json"
try:
vaccinations = requests.get(vaccination_url)
except:
return "False"

vaccinations_dict = {}
# Using lambda and filter to find our requested ISO Code
item = list(filter(lambda x: x["iso_code"] == iso, vaccinations.json()))
if item:
item = item[0]
# If data is found format it for our response.
vaccinations_dict = {
"data": item["data"][-1],
"iso_code": item["iso_code"].replace("OWID_", " "),
"country": item["country"],
}
response = jsonify(vaccinations_dict)
# Returning a 203 since it's a mirror of the OWID data.
response.status_code = 203
else:
# If no data is found return a 404.
response = jsonify(
{"status": 404, "error": "not found", "message": "invalid iso code"}
)
response.status_code = 404
return response
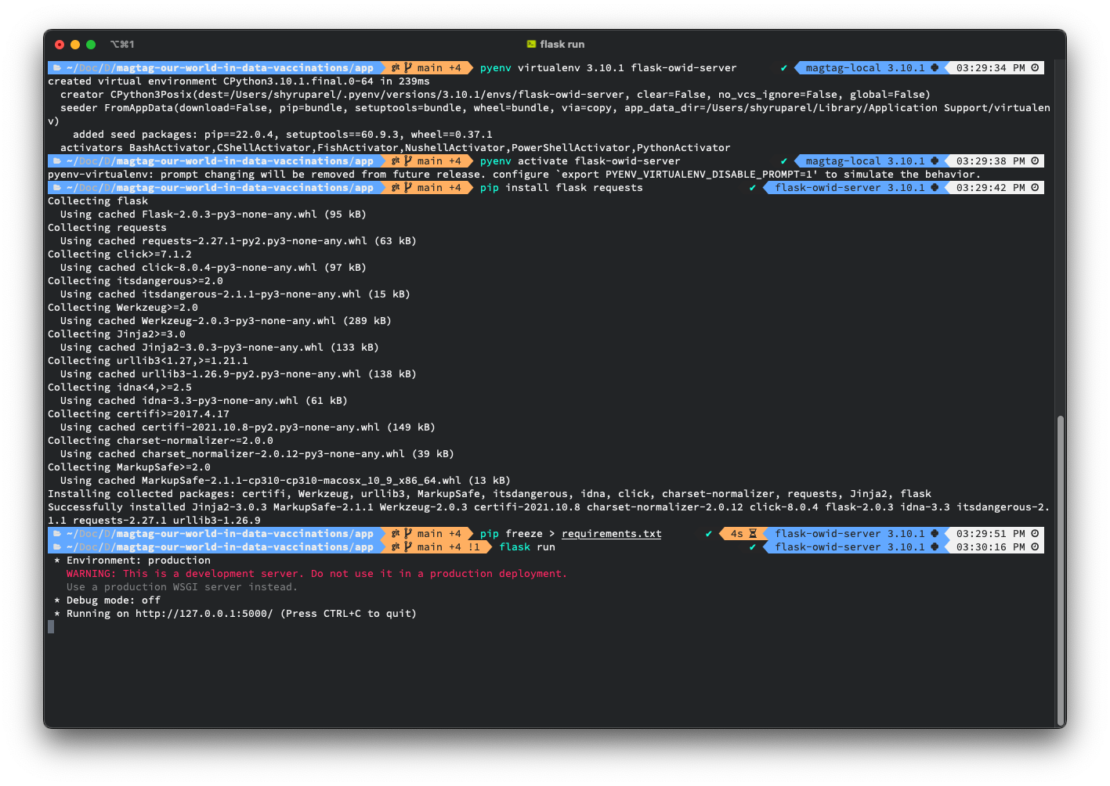
Lastly, you should get the code to install the dependencies and generate a requirements file. I use pyenv to manage my Python virtual environments, but you substitute that with your preferred method.
pyenv virtualenv 3.10.1 flask-owid-server
pyenv activate flask-owid-server
pip install flask requests
pip freeze > requirements.txt
flask run
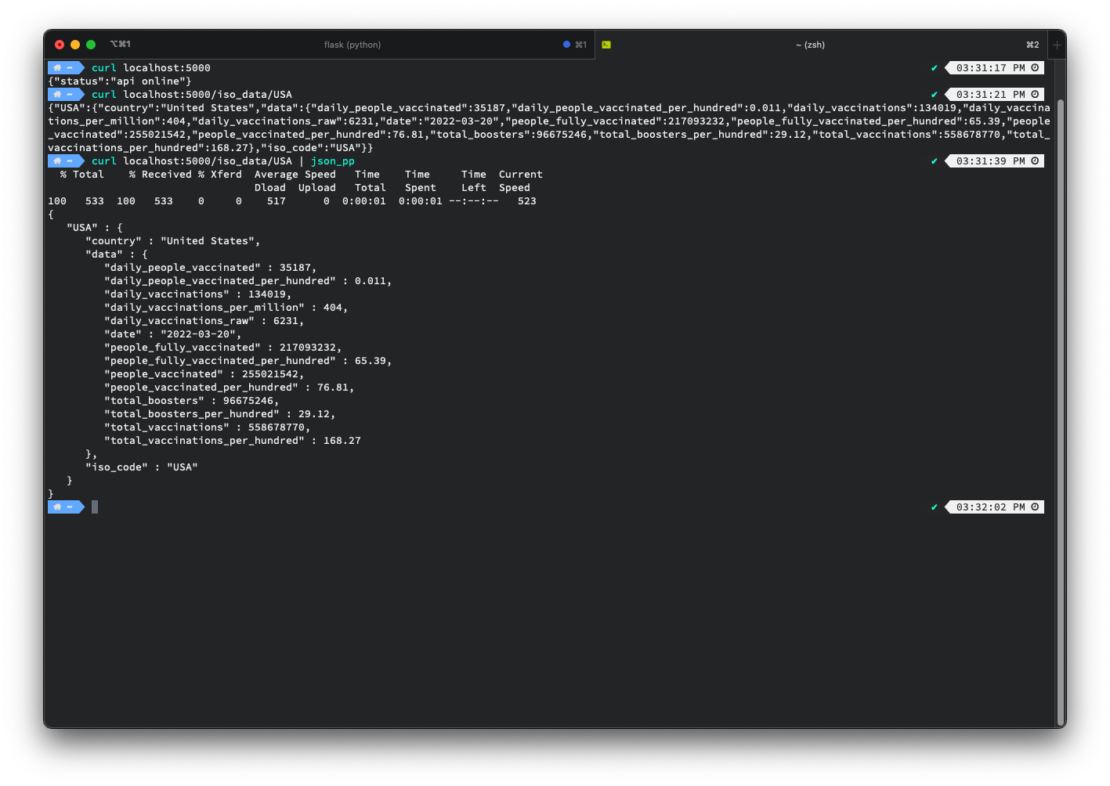
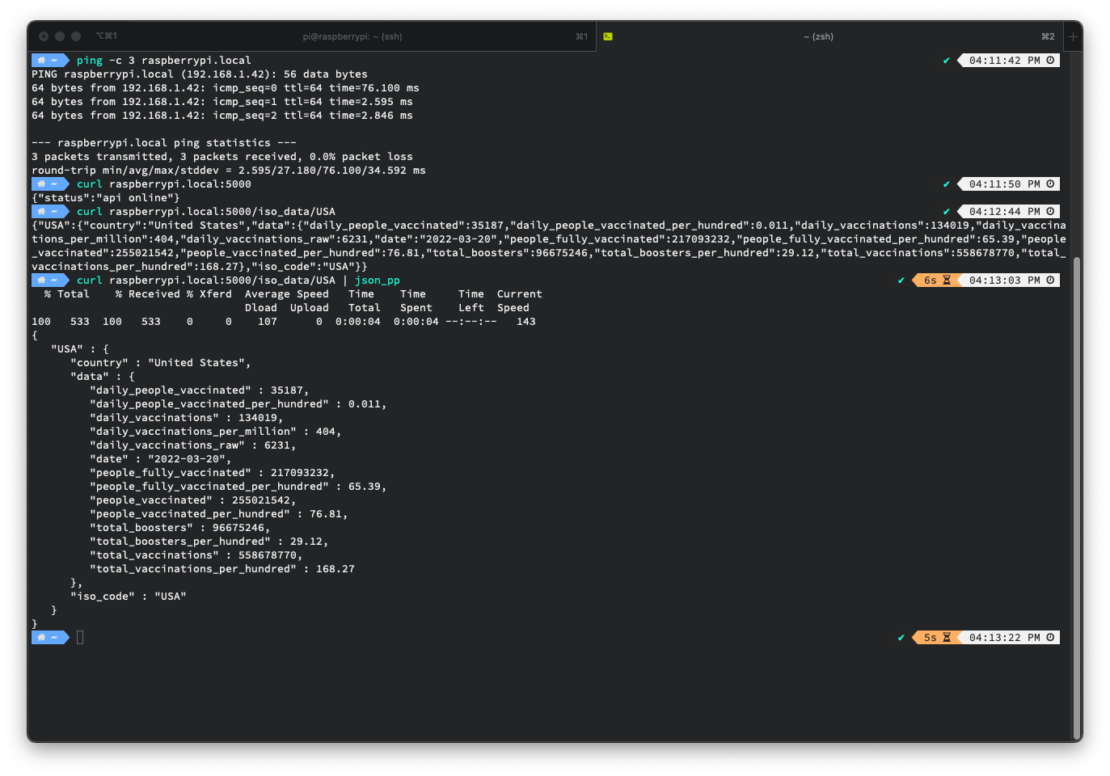
Next, open a new shell prompt and make a curl request to the Flask server, just to confirm that everything is running as expected.
curl localhost:5000
curl localhost:5000/iso_data/USA
Dockerizing and Deploying the Flask Server
With a functional Flask server, we can dockerize it and simplify the app-deployment process for the Raspberry Pi. I started by creating a Dockerfile.
#Use the python 3 base image.
FROM python:3-slim
#Expose ports
EXPOSE 5000
# Setup work directory.
WORKDIR /app
# Copy the requirements file to the container and the install dependencies.
COPY requirements.txt /app
RUN pip3 install -r requirements.txt --no-cache-dir
# Copy all the code into the container/
COPY . /app
# Spin up our flask server.
ENTRYPOINT ["python3"]
CMD ["app.py"]
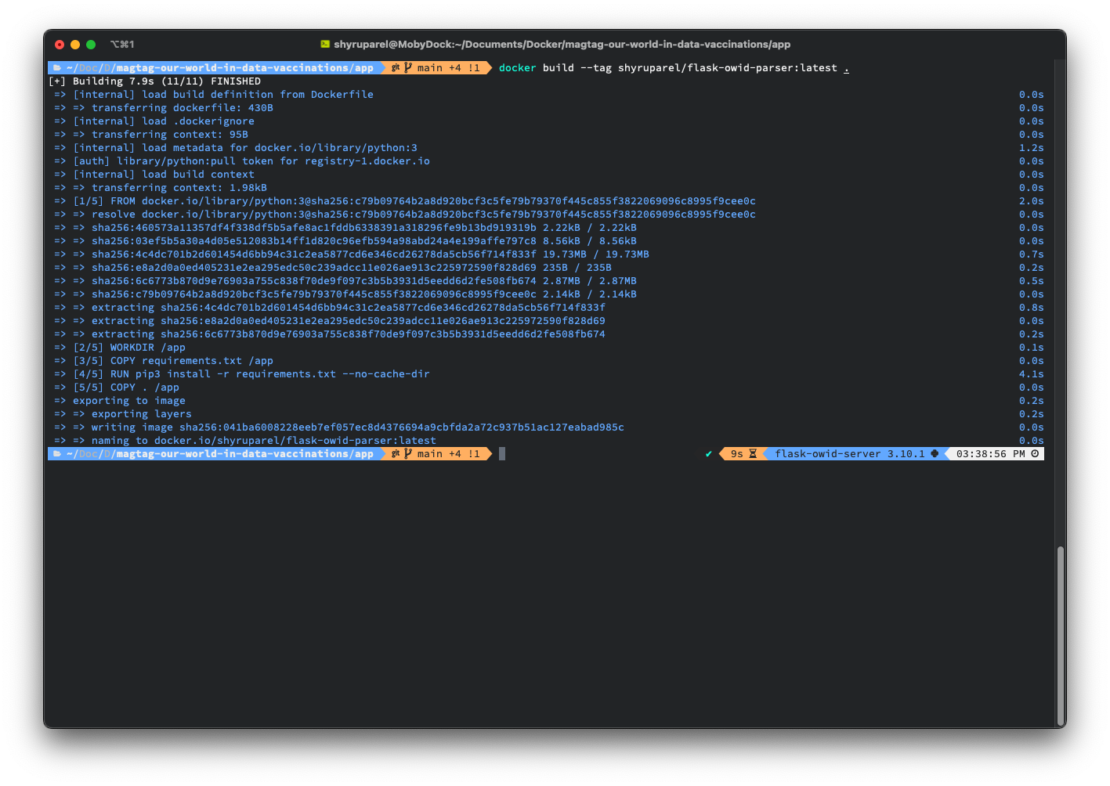
With this Dockerfile in place, I can run a Docker build command to create my image.
docker build --tag {yourdockerusernamehere}/flask-owid-parser:latest .
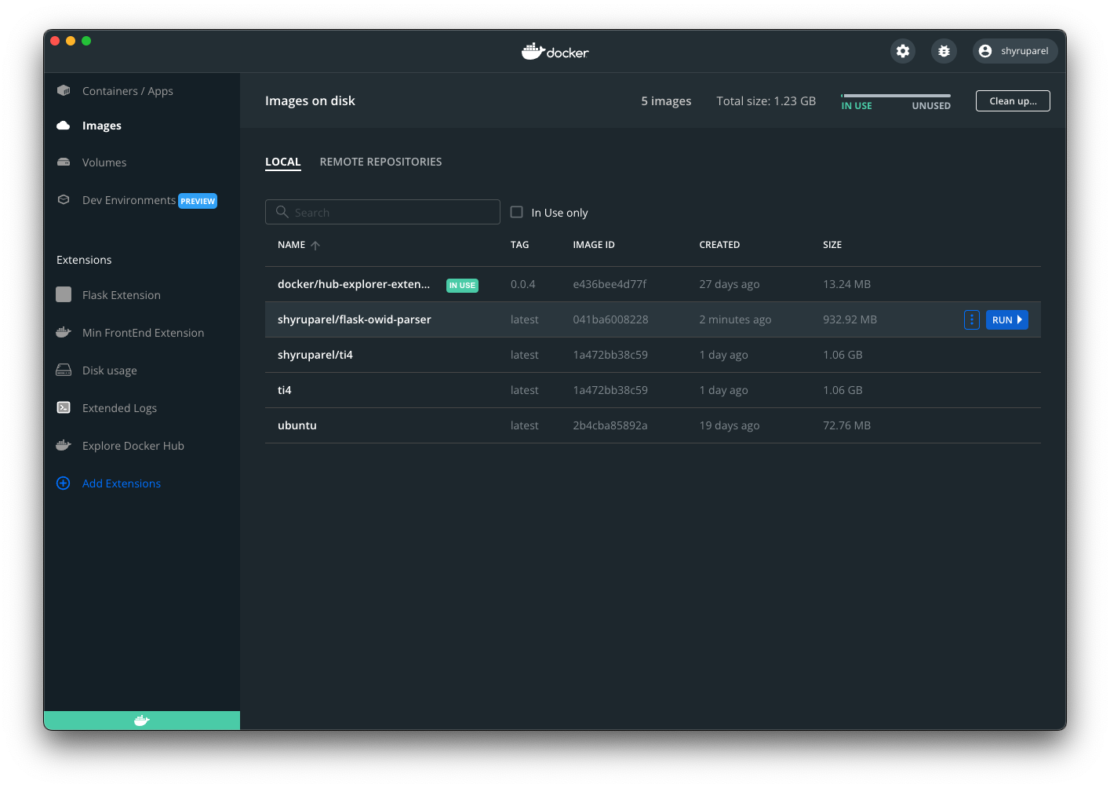
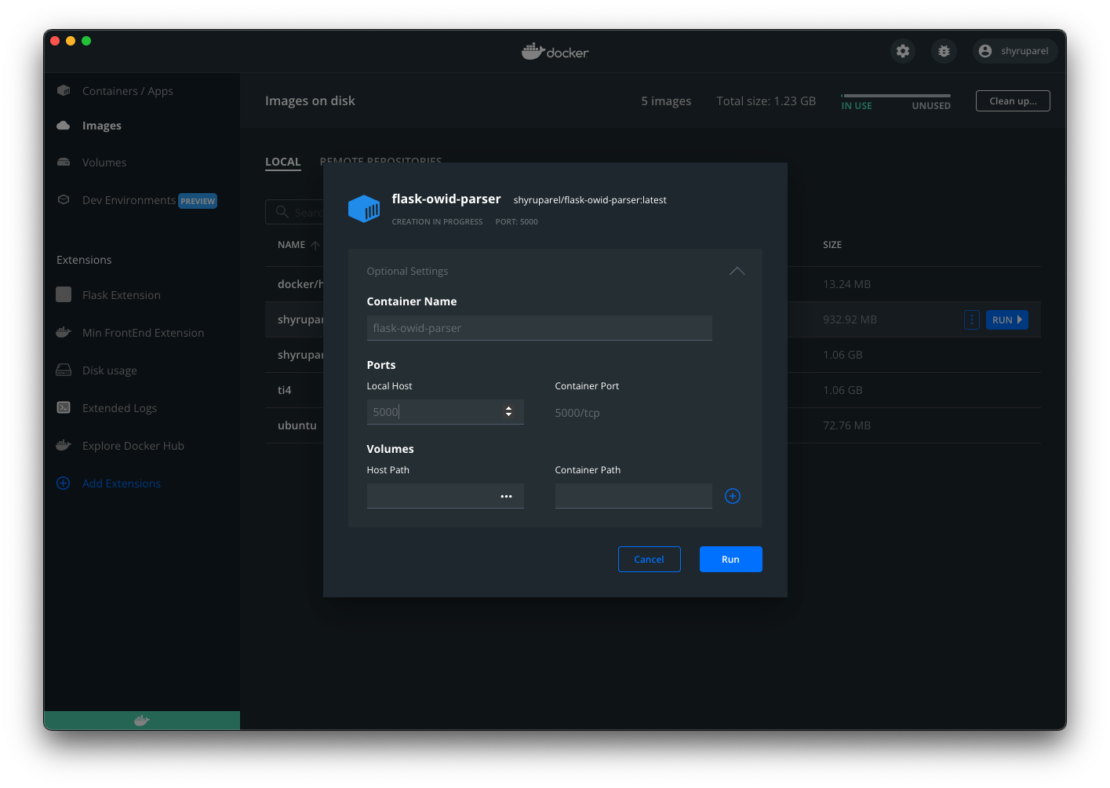
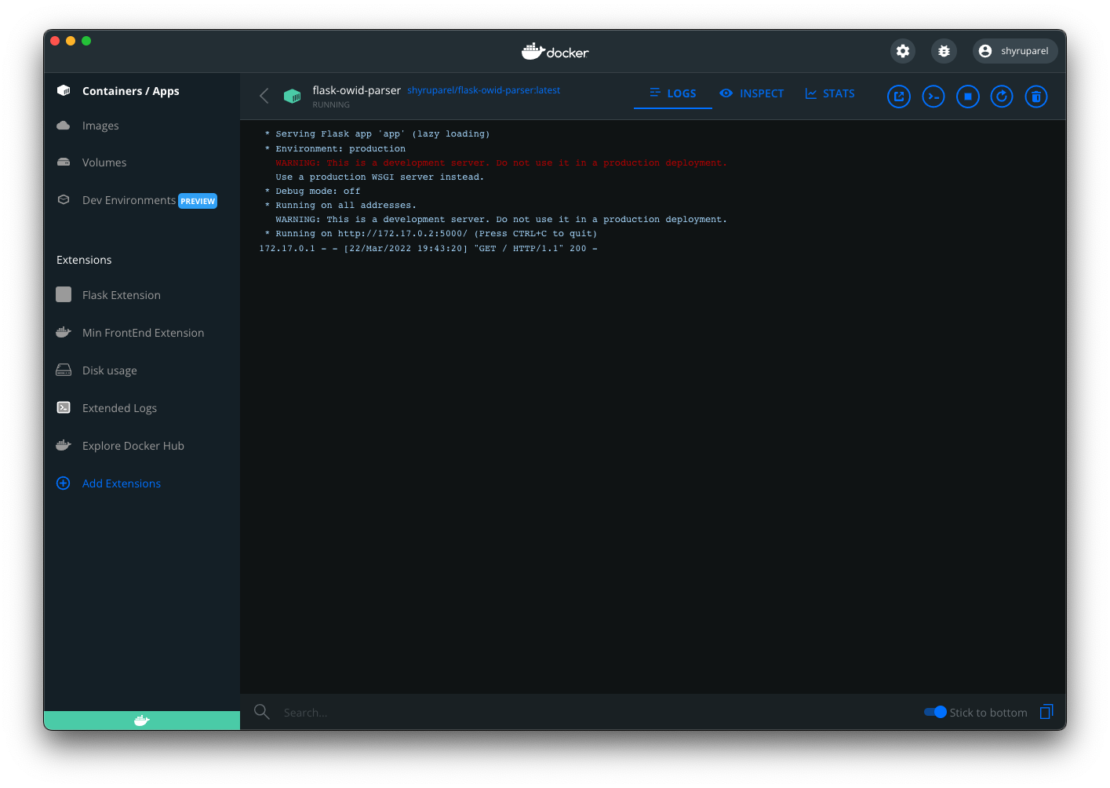
You can run your newly-created image from Docker Desktop—while making sure you name the container and set the local port to 5000.
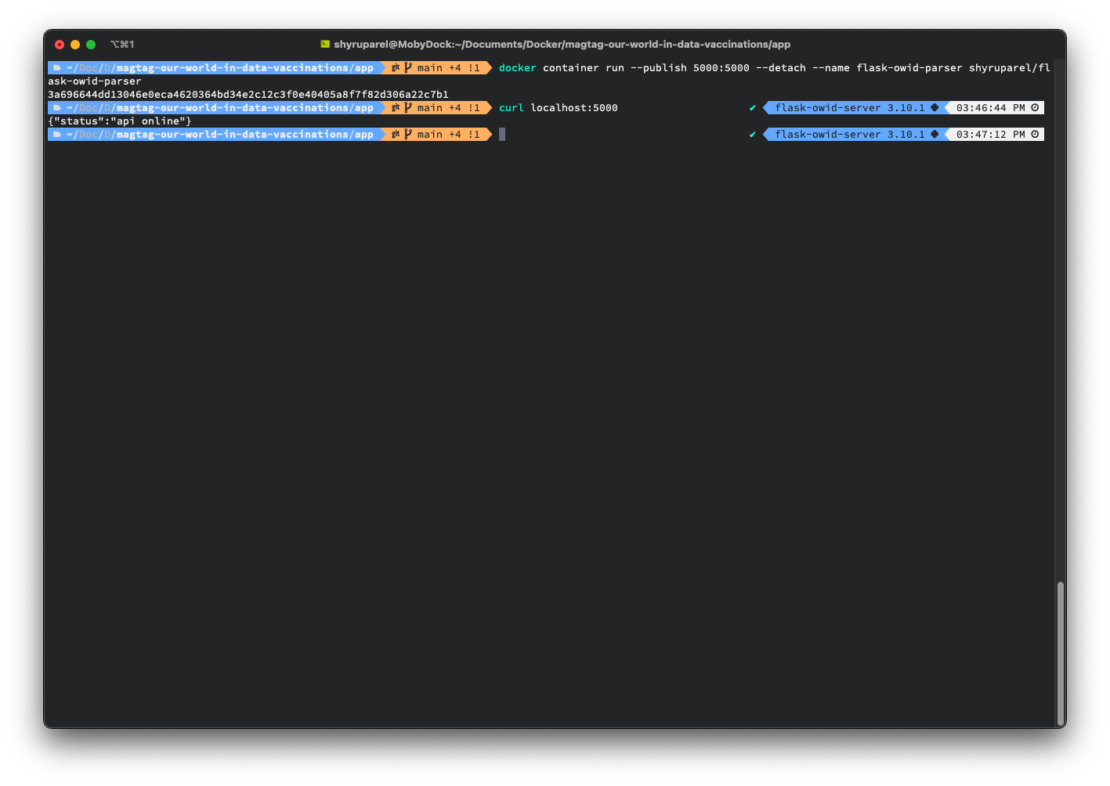
If you prefer using the command line, something like Docker CLI can achieve the same effect.
docker container run --publish 5000:5000 --detach --name flask-owid-parser {yourdockerusernamehere}/flask-owid-parser
Once again, make a curl request to localhost:5000 to confirm that everything is running correctly.
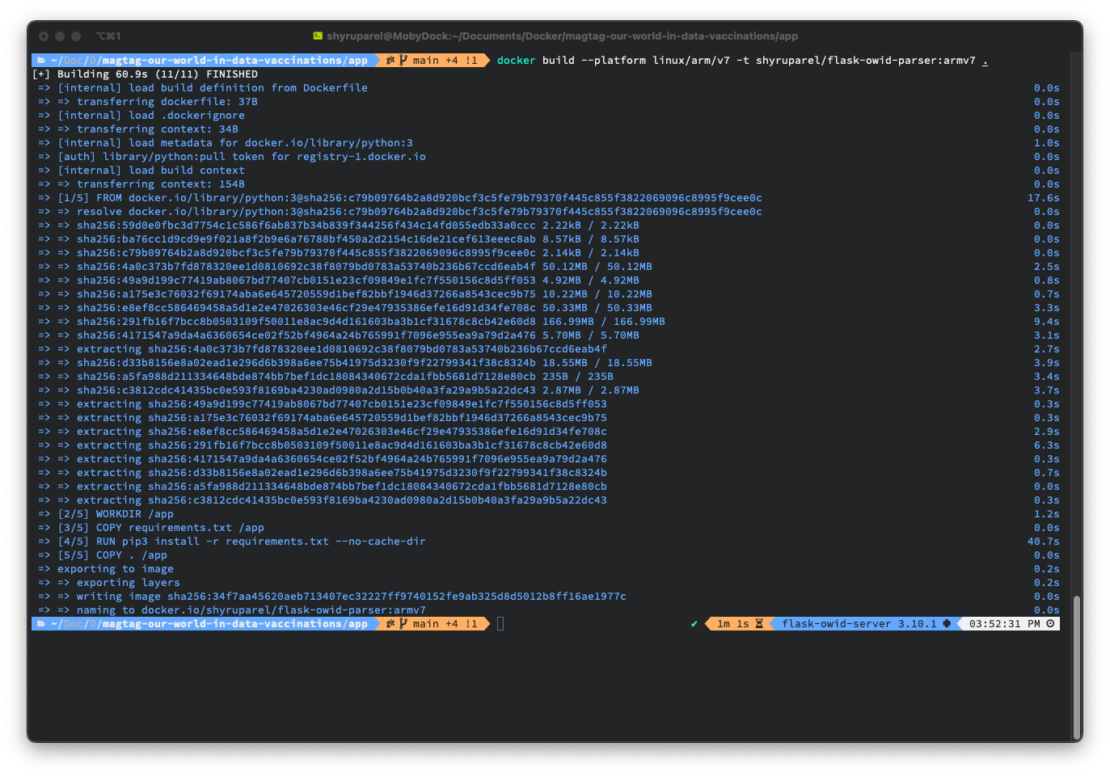
With everything verified on your machine, you can build the application to run on a Raspberry Pi. The Raspberry Pi 3 Model B from this example uses the armv7 platform, so I can create a build specifically targeting armv7. By running this build on my MacBook, the build time will be substantially faster than on my Raspberry Pi.
docker build --platform linux/arm/v7 -t {yourdockerusernamehere}/flask-owid-parser:armv7 .
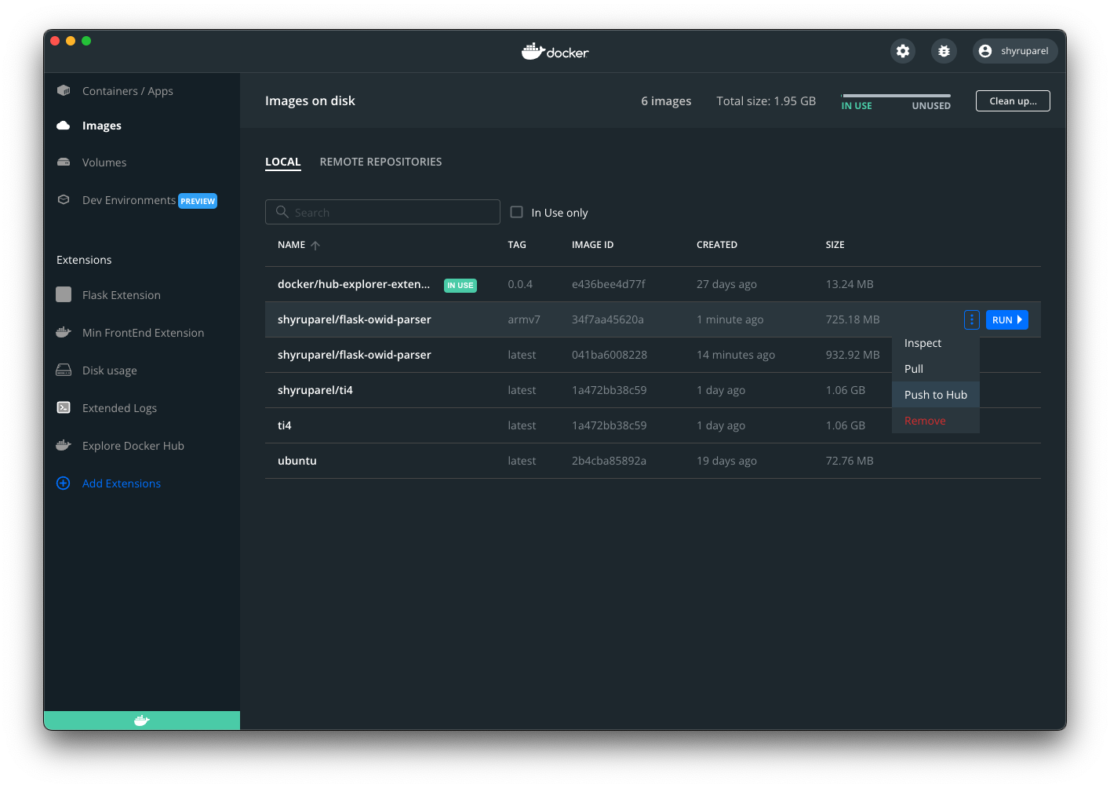
Back in Docker desktop, you can push your armv7 build to Docker Hub.
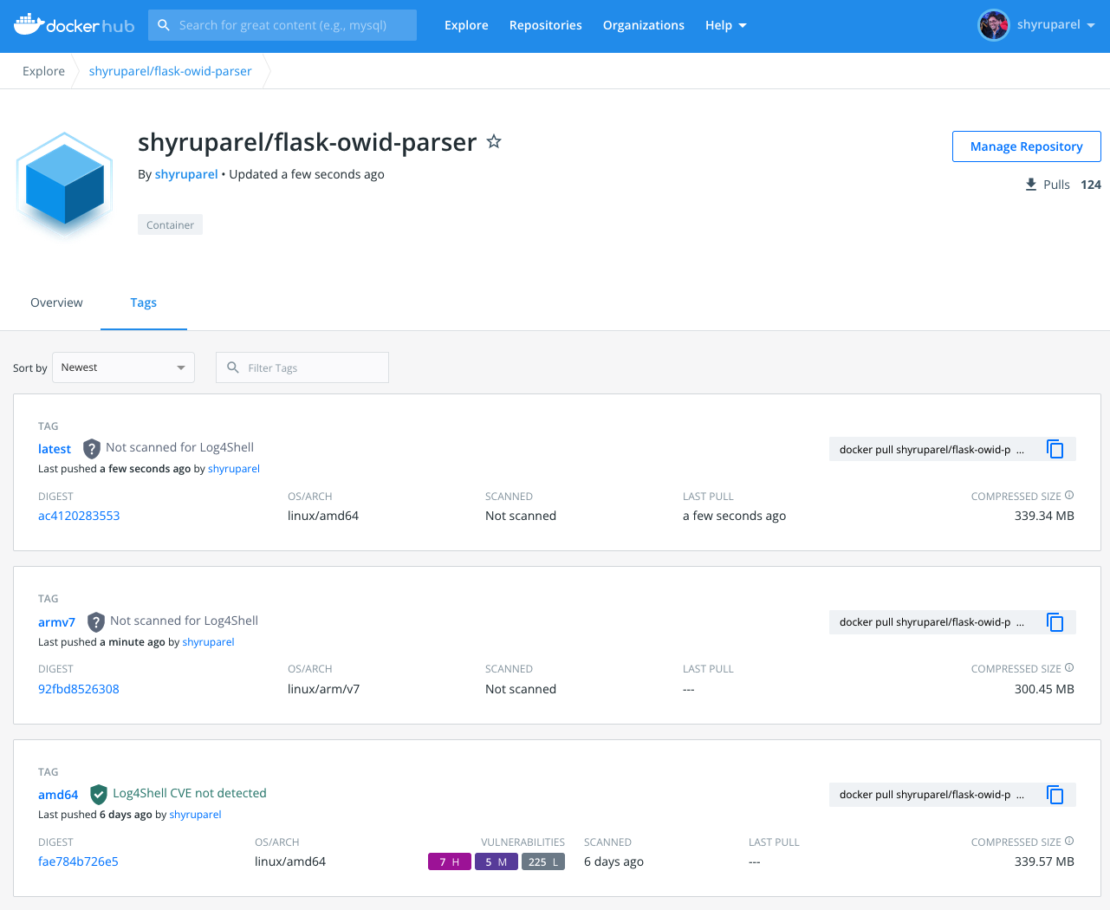
Head over to Docker Hub to confirm the armv7 build is displayed correctly.
SSH into your Raspberry Pi to start deploying this code. If you haven’t already installed Docker, you can view our documentation for instructions on getting started with Docker on the Pi.
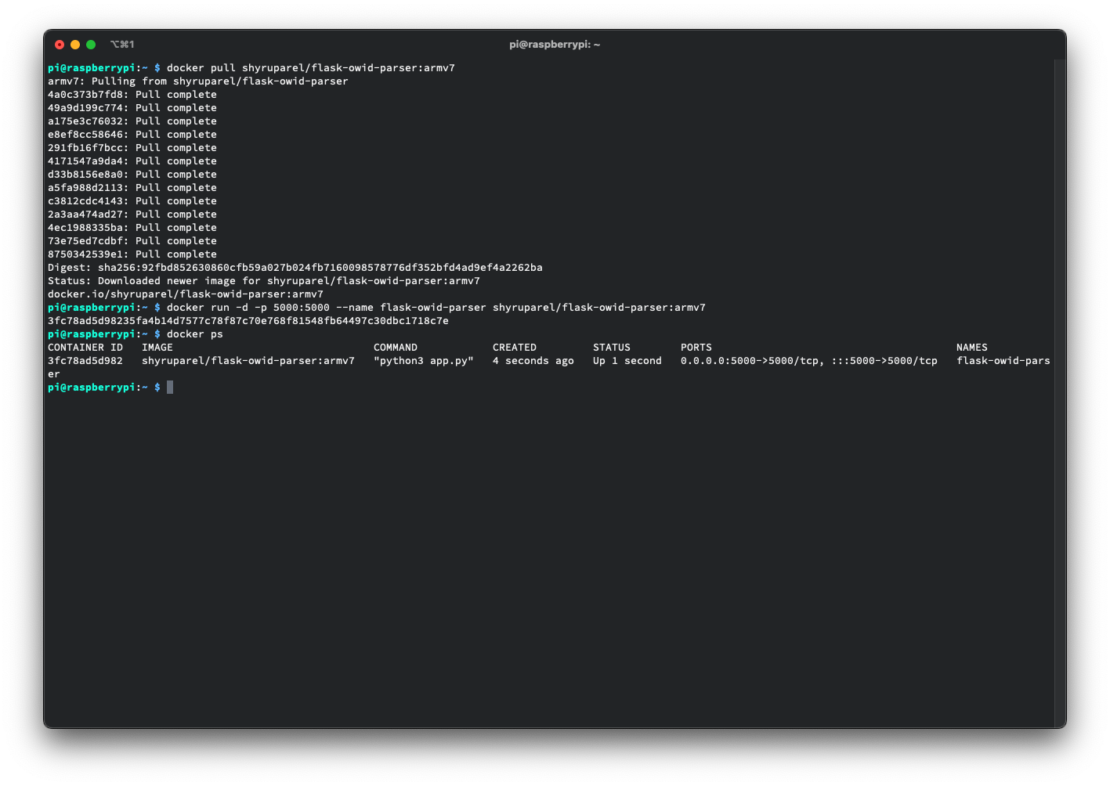
Next, pull the armv7 image from Docker Hub and run it on the Raspberry Pi.
docker pull {yourdockerusernamehere}/flask-owid-parser:armv7
docker run -d -p 5000:5000 --name flask-owid-parser shyruparel/flask-owid-parser:armv7
Back on my original MacBook, I can both confirm that the server’s running and that it’s accessible from my local network—via one final curl request. The default hostname on a fresh Raspberry Pi OS install is raspberrypi, so any Raspberry Pi running Pi OS automatically responds to raspberrypi.local. If that doesn’t work for you, swap raspberrypi.local with your Raspberry Pi’s IP address.
ping -c 3 raspberrypi.local
curl raspberrypi.local:5000
curl raspberrypi.local:5000/iso_data/USA
Configuring the MagTag
One of my favorite MagTag features is its Circuit Python support. Forget using pip to install dependencies. Instead, simply copy .mpy onto the MagTag via USB alongside your code. To set up a MagTag for the first time, I’d defer to the excellent tutorials put together by the folks over at Adafruit.
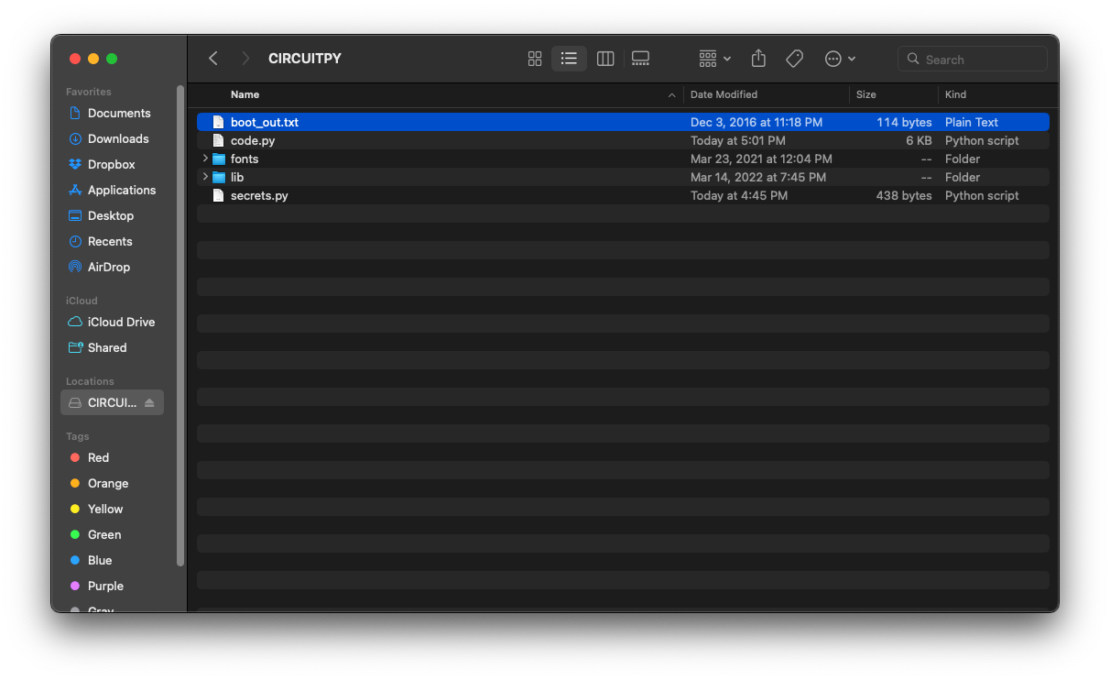
To install this project on your MagTag, visit the GitHub repo containing this project’s code. Drag all code from the MagTag directory onto your MagTag via USB.
If you inspect the code.py file, you’ll notice that the MagTag is configured to connect to the Raspberry Pi.
# Build our endpoint
endpoint_iso_first = "http://raspberrypi.local:5000/iso_data/{}".format(
secrets["iso_first"]
)
Update the secrets.py file to include the information for your own Wifi network. Ensure that your MagTag and Raspberry Pi share the same network.
Reboot the MagTag to see the most recent information—posted by the folks at Our World in Data.
Head over to GitHub to find the full source code for this project with dependencies, and links to the image on Docker Hub. First-time Python and Docker users should browse our quick start tutorial for Python devs.
Bio: Shy Ruparel is a Sr. Developer Advocate at Docker. He’s been working on empowering developer communities for almost a decade. He has a passion for silly IoT projects, good jokes, and the staying power to wish you a great day on Twitter every single day.

Feedback
0 thoughts on "Tracking Global Vaccination Rates with Docker, Python, and IoT"