
With over 87,000 stars and 3,100 contributors, Node.js has become a leading choice for enterprise developers in 2022. It’s an open source, cross-platform runtime environment that helps developers build varied server-side tools and applications in JavaScript.
Developers use Node.js to build fast, scalable, and real-time apps — thanks to its highly-robust event-driven runtime. It’s also asynchronous. Node.js can handle a huge number of concurrent connections, with high throughput, as traffic spikes. Accordingly, it’s ideal for building microservices architectures.

Users have downloaded our Node.js Docker Official Image more than 1 billion times from Docker Hub. What’s driving this significant download rate? There’s an ever-increasing demand for Docker containers to streamline development workflows, while giving Node.js developers the freedom to innovate with their choice of project-tailored tools, application stacks, and deployment environments.
We’ll show you how to rapidly and easily containerize your Node.js app — seamlessly circumventing common Node compatibility issues while accelerating deployment. This lets your application easily run cross-platform on different CPU architectures.
Building the Application
This walkthrough will show you how to easily build a Node.js to-do list app with Docker.
First, we’ll create our simple to-do list application in Node.js without using Docker. You’ll see how the application lets you create and delete task lists using the Redis backend database.
Next, we’ll build a Docker image for that application. You’ll also learn how Docker Compose can help you rapidly deploy your application within containers. Let’s get started.
Prerequisites
- NPM – a node package manager used for Node.js app development
- Node.js – our runtime for building web applications
- Express – a backend web-application framework for Node.js
- Bootstrap – a toolkit for responsive, front-end web development
- Redis – an in-memory, key-value, NoSQL database used for caching, data storage, and message brokering
- Docker Desktop – a suite of software-development tools for creating, sharing, and running individual containers
Getting Started
Once you’ve installed your Node.js packages on your machine, follow these steps to build a simple to-do list app from scratch.
Starting with NodeJS
- Create an empty directory:
mkdir todolist
2. Run the npm init command to set up a new npm package.
npm init
This utility walks you through creating a package.json file that describes your app and its dependencies.
{
  "name": "todolist",
  "version": "1.0.0",
  "description": "A Sample Todo-List app",
  "main": "todolist.js",
  "scripts": {
    "test": "echo \"Error: no test specified\" && exit 1"
  },
  "repository": {
    "type": "git",
    "url": "git+https://github.com/ajeetraina/todolist.git"
  },
  "keywords": [
    "node.js"
  ],
  "author": "Ajeet Singh Raina",
  "license": "MIT",
  "bugs": {
    "url": "https://github.com/ajeetraina/todolist/issues"
  },
  "homepage": "https://github.com/ajeetraina/todolist#readme"
}
With your new package.json, run npm install.
npm install --save express redis ejs dotenv
Here’s your result:
+ [email protected]
+ [email protected]
+ [email protected]
+ [email protected]
added 79 packages from 106 contributors and audited 79 packages in 5.112s

4 packages are looking for funding
run `npm fund` for details

found 0 vulnerabilities
Next, open your package.json file to see the following entries:
{
  "name": "todolist",
  "version": "1.0.0",
  "description": "A Sample Todo-List app",
  "main": "todolist.js",
  "scripts": {
    "test": "echo \"Error: no test specified\" && exit 1"
  },
  "repository": {
    "type": "git",
    "url": "git+https://github.com/ajeetraina/todolist.git"
  },
  "keywords": [
    "node.js"
  ],
  "author": "Ajeet Singh Raina",
  "license": "MIT",
  "bugs": {
    "url": "https://github.com/ajeetraina/todolist/issues"
  },
  "homepage": "https://github.com/ajeetraina/todolist#readme",
  "dependencies": {
    "dotenv": "^16.0.0",
    "ejs": "^3.1.6",
    "express": "^4.17.3",
    "redis": "^4.0.6"
  }
}
Installing nodemon
Nodemon is a handy CLI utility that’s primarily used for development purposes, instead of production. It monitors for any changes in your source code and automatically restarts the app server to apply them. Additionally, you can add nodemon to your dev dependencies if you want to run it using scripts. You can alternatively install it globally. Nodemon is open source and available on GitHub.
The recommended way to install nodemon is through the npm utility.
npm install --save-dev nodemon
Here’s your result:
+ [email protected]
added 106 packages from 55 contributors and audited 185 packages in 3.514s

18 packages are looking for funding
run `npm fund` for details

found 0 vulnerabilities
You should now be able to see nodemon added to your package.json file:
{
  "name": "todo-list",
  "version": "1.0.0",
  "description": "A Sample Todo List app",
  "main": "app.js",
  "scripts": {
    "start": "nodemon app.js"
  },
  "repository": {
    "type": "git",
    "url": "git+https://github.com/ajeetraina/todolist.git"
  },
  "keywords": [
    "nodejs",
    "express"
  ],
  "author": "Ajeet S Raina",
  "license": "MIT",
  "bugs": {
    "url": "https://github.com/ajeetraina/todolist/issues"
  },
  "homepage": "https://github.com/ajeetraina/todolist#readme",
  "dependencies": {
    "dotenv": "^16.0.0",
    "ejs": "^3.1.6",
    "express": "^4.17.3",
    "redis": "^4.0.6"
  },
  "devDependencies": {
    "nodemon": "^2.0.15"
  }
}
Defining the To-Do List Web App
First, create an empty app.js file that defines a web app using the Express.js framework. Next, you’ll have to ensure that all essential components are in place before initiating the build process.
The first portion of your JavaScript code imports all essential packages into the project. However, you’ll also have to create an instance of an Express application along with redis, body-parser, and path. You then must initialize the express variable. Express is a minimal — but flexible — Node.js web-application framework with robust features for web and mobile applications. Express requires a middleware module called body-parser to extract incoming data from a POST request.
‘use strict’;

const express = require('express');
const redis = require('redis');
const path = require('path');
const port = 3000;
const bodyParser = require('body-parser');


var app = express();

const client = redis.createClient();

client.on('connect', () => {
  console.log('Successfully connected to Redis...');
});
Defining the View Engine
Next, you’ll need the view engine, which is useful for rendering web pages. You’ll also be using a popular view engine called Embedded JavaScript (EJS). This is essentially a simple templating language-engine that lets developers generate HTML using plain JavaScript. Your code section defines the path to the view engine. The bodyParser helps normalize each element.
The last line of this code snippet lets you insert an image under the /public directory — so that index.ejs can grab it and display it on the frontend:
app.set('views'), path.join(__dirname, 'views');
app.set('view engine', 'ejs');

app.use(bodyParser.json());
app.use(bodyParser.urlencoded({extended: false}));

app.use(express.static(path.join(__dirname, 'public')))
GET
This code snippet uses Express router to handle your app’s routing. Whenever a user requests the app from a web browser, it’ll serve a response from the Redis database.
app.get('/', (req, res) => {
  var title = 'A Simple Todo-List App';
  var counter = 0;
  client.LRANGE('todo', 0, -1, (err, reply) => {
    if(err){
      res.send(err);
      return;
    }
    res.render('index', {
      title: title,
      todo: reply,
      counter: counter
    });
  });
});
Quick Tips: Redis lists can be defined as lists of strings that are stored in order of insertion:
RPUSH: adds a new element to the right of the list. (i.e. inserts the element at the tail of the list)LRANGE: retrieves a subset of list elements based on the provided “start” and “stop” offsets
POST
Similarly, whenever you want to push data to the Redis database, you’d use the Redis RPUSH command as shown:
app.post('/todo/add', (req, res, next) => {
  var todo = req.body.todos;
  client.RPUSH('todo', todo, (err, reply) => {
    if(err){
      res.send(err);
      return;
    }
    res.redirect('/');
  });
});
Should you want to delete the messages in the Redis database by index, you’d use the LREM command. This Redis command removes the first-count occurrences of elements equal to elements from the list.
app.post('/todo/delete', (req, res, next) => {
  var delTODO = req.body.todo;
  var deleted = '__DELETED__';
  client.LRANGE('todo', 0, -1, (err, todo) => {
    for(let i = 0; i < delTODO.length; i++){
      client.LSET('todo', delTODO[i], deleted);
    }
    client.LREM('todo', 0, deleted);
    res.redirect('/');
  });
});
Meanwhile, this entry tells your app to start a server and listen for connections on port 3000:
app.listen(3000, () => {
  console.log('Server listening at port 3000...');
});

module.exports = app;
Here’s what your completed code will look like:
‘use strict’;

const express = require('express');
const redis = require('redis');
const path = require('path');
const port 3000
const bodyParser = require('body-parser');


var app = express();

const client = redis.createClient();

client.on('connect', () => {
  console.log('Successfully connected to Redis...');
});

app.set('views'), path.join(__dirname, 'views');
app.set('view engine', 'ejs');

app.use(bodyParser.json());
app.use(bodyParser.urlencoded({extended: false}));

app.use(express.static(path.join(__dirname, 'public')));

app.get('/', (req, res) => {
  var title = 'A Simple Todo App List';
  var counter = 0;
  client.LRANGE('todo', 0, -1, (err, reply) => {
    if(err){
      res.send(err);
      return;
    }
    res.render('index', {
      title: title,
      todo: reply,
      counter: counter
    });
  });
});

app.post('/todo/add', (req, res, next) => {
  var todo = req.body.todos;
  client.RPUSH('todo', todo, (err, reply) => {
    if(err){
      res.send(err);
      return;
    }
    res.redirect('/');
  });
});

app.post('/todo/delete', (req, res, next) => {
  var delTODO = req.body.todo;
  var deleted = '__DELETED__';
  client.LRANGE('todo', 0, -1, (err, todo) => {
    for(let i = 0; i < delTODO.length; i++){
      client.LSET('todo', delTODO[i], deleted);
    }
    client.LREM('todo', 0, deleted);
    res.redirect('/');
  });
});

app.listen(3000, () => {
  console.log('Server listening at port 3000...');
});

module.exports = app;
Building a View Engine
The process of building a view engine is relatively simple. To do so, create an empty folder called “views” and add your content to a file namedindex.ejs:
!DOCTYPE html>
<html lang="en">
<head>
  <meta charset="UTF-8">
  <meta name="viewport" content="width=device-width, initial-scale=1.0">
  <meta http-equiv="X-UA-Compatible" content="ie=edge">
  <link rel="stylesheet" href="https://bootswatch.com/4/slate/bootstrap.min.css">
  <title>A Simple Todo List App</title>
</head>
<body>
  <div class="container">
    <h1 class="text-center"> <%= title %> </h1>
    <img src="/images/todo.jpeg" class="center"  width="300" alt="">
    <form action="/todo/add" method="POST">
      <div class="form-group">
        <input type="text" class="form-control" name="todos" placeholder="Start typing and Press Enter...">
      </div>
    </form>
    <form action="/todo/delete" method="POST">

      <% todo.forEach( (list) => { %>
        <div class="alert alert-success">
          <input type="checkbox" class="form-check-input mt-2" name="todo" value="<%= counter %>">
          <h4 class="d-inline">> </h4> <strong><%= list %></strong>
        </div>
        <% counter++ %>
      <% }) %>
        <input type="submit" value="Remove" class="btn btn-primary">
    </form>

  </div>
</body>
</html>
Next, let’s run the Redis server in your system. If you’re using Mac OS, we recommend using Homebrew as shown below:
brew install redis
brew services start redis
Once this is finished, verify that you are able to connect to Redis server via redis-cli:
redis-cli
127.0.0.1:6379> info
..
Finally, simply start nodemon with the following command. Your result is displayed soon after:
nodemon .
[nodemon] 2.0.12
[nodemon] to restart at any time, enter `rs`
[nodemon] watching path(s): *.*
[nodemon] watching extensions: js,mjs,json
[nodemon] starting `node .`
Server listening at port 3000...
Successfully connected to Redis...
You’ll then want to confirm that your app is working properly. Open your browser and access http://localhost:3000 in the address bar. Here’s what you’ll see:
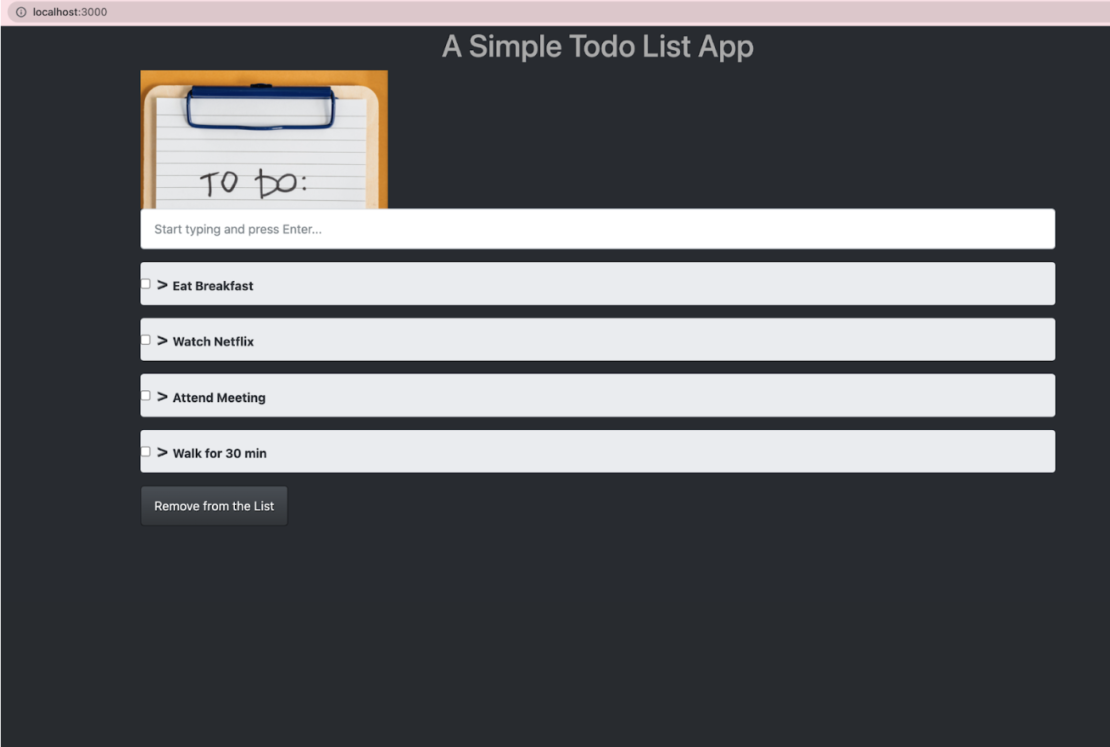
Once you start typing out your to-do list, you’ll see the following activity in Redis database:
1650438955.239370 [0 172.17.0.1:59706] "info"
1650438999.498418 [0 172.17.0.1:59708] "info"
1650439059.072301 [0 172.17.0.1:59708] "lrange" "todo" "0" "-1"
1650439086.492042 [0 172.17.0.1:59708] "rpush" "todo" "Watch netflix"
1650439086.500834 [0 172.17.0.1:59708] "lrange" "todo" "0" "-1"
1650439094.054506 [0 172.17.0.1:59708] "rpush" "todo" "Attend Meeting"
1650439094.059366 [0 172.17.0.1:59708] "lrange" "todo" "0" "-1"
1650439099.726832 [0 172.17.0.1:59708] "rpush" "todo" "Walk for 30 min"
1650439099.731735 [0 172.17.0.1:59708] "lrange" "todo" "0" "-1"
Building a Multi-Container Node.js app with Docker Desktop
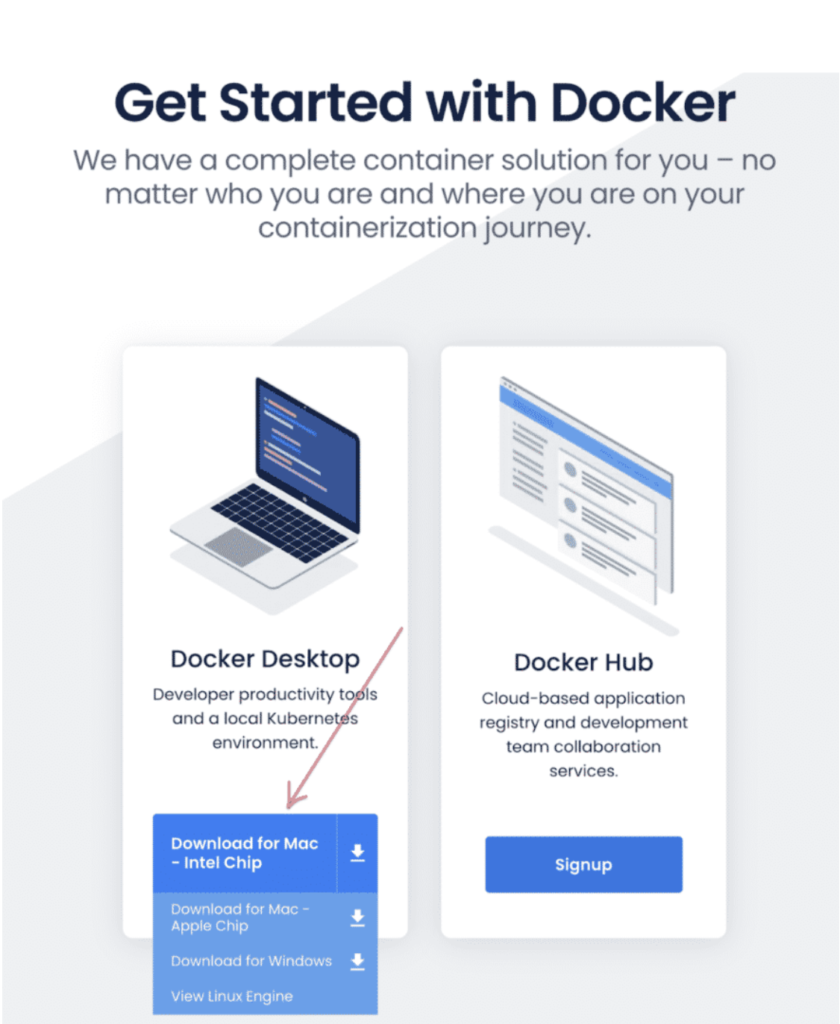
Let’s assess how you can run this app inside a Docker container using the official Docker image. First, you’ll need to install Docker Desktop — which lets you build a Docker image for your app.
Next, create an empty file called “Dockerfile”:
touch Dockerfile
Use your favorite text editor to open the Dockerfile. You’ll then need to define your base image.
Accordingly, ensure that you’re using the Long Term Support (LTS) version of Node.js, and the minimal alpine image type. This helps minimize your image’s footprint, and therefore its attack surface:
FROM node:lts-alpine
Quick Tips: We recommended using explicit and deterministic Docker image base tags. Smaller Docker images offer quicker re-builds. Docker image builds are also highly varied. For example, if you use the node:latest tag with a build image, it’s possible that every build will try pulling a newly-built Docker node image. This could introduce non-deterministic behavior, which can hamper deployment consistency.
Want to learn more about how Node.js and Docker can work together? Join us at DockerCon 2022 — where you’ll learn best practices for managing Node.js and JavaScript projects while developing, testing, and operating containers.
Next, let’s quickly create a directory to house our image’s application code. This acts as the working directory for your application:
WORKDIR '/var/www/app'
Both Node.js and NPM come pre-installed within your image. However, you’ll need to install your app dependencies using the npm binary.
To bundle your app’s source code within your Docker image, use the COPY instruction:
COPY..
Your app binds to port 3000. Use the EXPOSE instruction to have the Docker daemon map it properly:
EXPOSE 3000
Your simple Dockerfile will look something like this:
FROM node:lts-alpine

COPY package*.json ./

WORKDIR '/var/www/app'

RUN npm install --save express redis ejs dotenv

COPY . .

EXPOSE 3000
That said, you’ll now need to build your Docker image. Enter the following command to kickstart this process, which produces an output soon after:
docker build -t ajeetraina/todolist .
docker images
REPOSITORY                             TAG       IMAGE ID       CREATED         SIZE
ajeetraina/todolist                    latest    6aeeaac8ace3   2 minutes ago   131MB
Next, you’ll create a .dockerignore file. This file closely resembles.gitignore. It prevents files from being added to the initial build context — which the Docker daemon receives during docker build execution.
You’ll create this ..dockerignore file in the same directory as your Dockerfile with the following:
node_modules
.git
This prevents local modules and debug logs from being copied onto your Docker image. When this happens, you can potentially overwrite modules installed within your image.
If you rebuild the Docker image and verify it, you can save roughly 4MB of disk space:
docker images
REPOSITORY                             TAG       IMAGE ID       CREATED          SIZE
ajeetraina/todolist                    latest    453c5aeae5e0   3 seconds ago    127MB
Finally, it’s time to create a Docker Compose file. This single YAML file lets you specify your frontend app and your Redis database:
services:

  app:
    build: ./
    volumes:
       - ./:/var/www/app
    ports:
      - 3000:3000
    environment:
      - REDIS_URL=redis://db:6379
      - NODE_ENV=development
      - PORT=3000
    command:
       sh -c 'node app.js'
    depends_on:
      - db

  db:
    image: redis
Your example application has the following parts:
- Two services backed by Docker images: your frontend web app and your backend database
- The frontend, accessible via port 3000
- The
depends_onparameter, letting you create the backend service before the frontend service starts - One persistent volume, attached to the frontend
Next, you’ll specify your REDIS_URL within your app.js file — letting you pass Redis endpoints within your Docker Compose file:
const client = redis.createClient({ url: process.env.REDIS_URL });
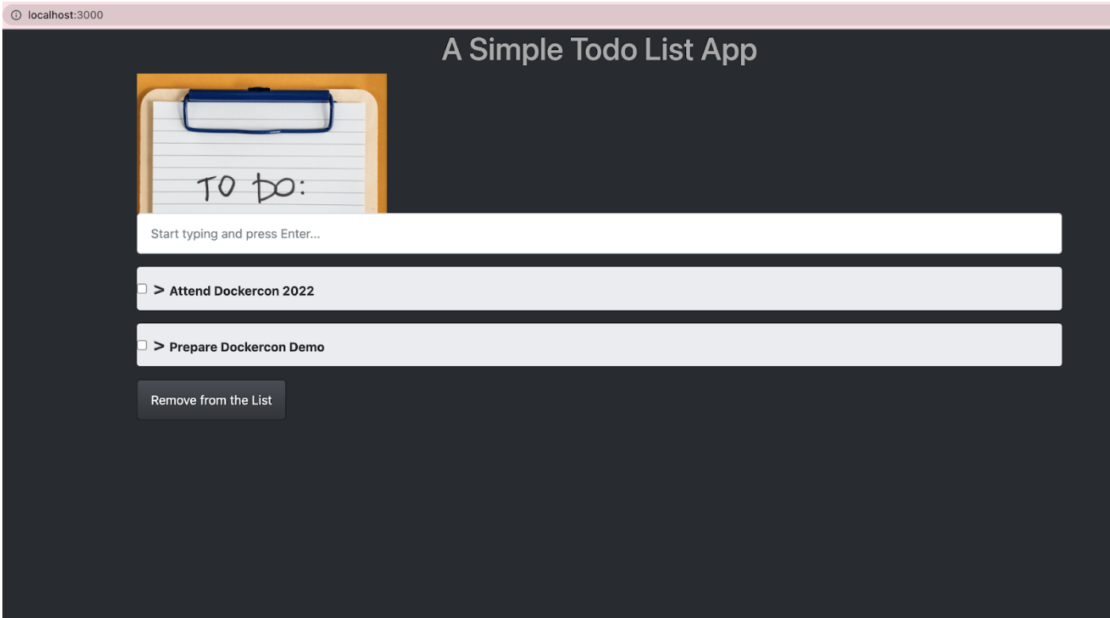
You’ll then want to start your services using the docker-compose up command. Just like that, you’ve created and deployed your Node.js to-do list app! This is usable in your browser, like before:
Want to dig a little deeper? My complete project code is available on my GitHub page.
Conclusion
Docker helps accelerate the process of building, running, and sharing modern applications. Docker Official Images help you develop your own unique applications, no matter what tech stack you’re accustomed to. With a single YAML file, we demonstrated how Docker Compose helps you easily build a multi-container Node.js app with Redis.
We can even take Docker Compose and develop real-world microservices applications. With just a few extra steps, you can apply this tutorial while building applications with much greater complexity. Happy coding!
Additional Resources
- Getting Started with Node.js tutorial
- Getting Started with Docker using Node – Part 1
- Getting started with Docker using Node – Part 2
- Top 4 Tactics To Keep Node.js Rockin’ in Docker
- Docker for Node.js Developers: 5 Things You Need to Know Not to Fail Your Security
- How To Setup Your Local Node.js Development Environment Using Docker
Feedback
0 thoughts on "JumpStart Your Node.js Development"