
.NET is a free, open-source development platform for building numerous apps, such as web apps, web APIs, serverless functions in the cloud, mobile apps and much more. .NET is a general purpose development platform maintained by Microsoft and the .NET community on GitHub. It is cross-platform, supporting Windows, macOS and Linux, and can be used in device, cloud, and embedded/IoT scenarios.
Docker is quite popular among the .NET community. .NET Core can easily run in a Docker container. .NET has several capabilities that make development easier, including automatic memory management, (runtime) generic types, reflection, asynchrony, concurrency, and native interop. Millions of developers take advantage of these capabilities to efficiently build high-quality applications.
Building the Application
In this tutorial, you will see how to containerize a .NET application using Docker Compose. The application used in this blog is a Webapp communicating with a Postgresql database. When the page is loaded, it will query the Student table for the record with ID and display the name of student on the page.
What will you need?
Getting Started
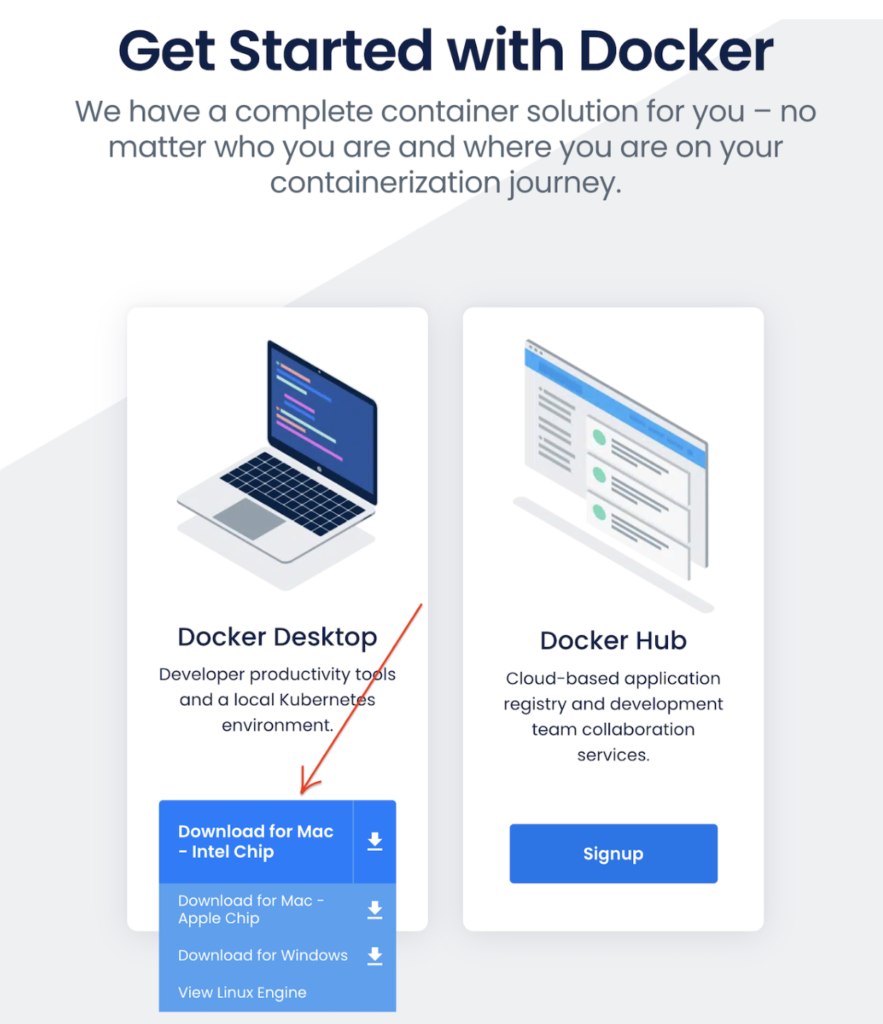
Visit https://www.docker.com/get-started/ to download Docker Desktop for Mac and install it in your system.
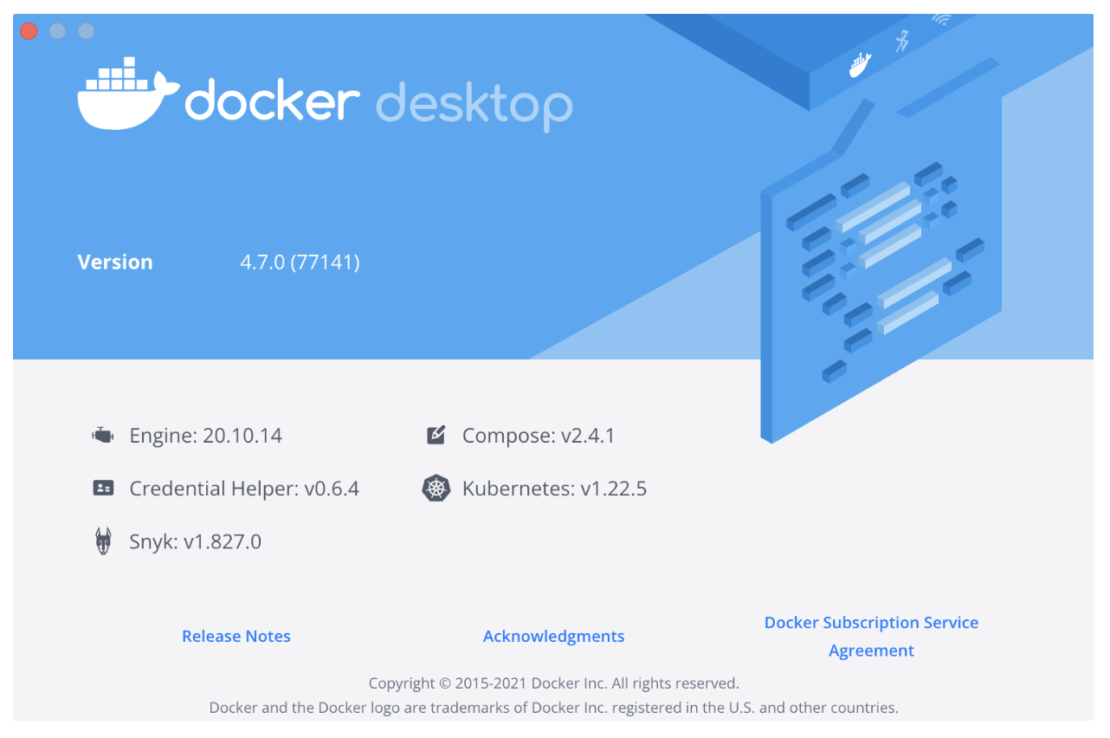
Once the installation gets completed, click “About Docker Desktop” to verify the version of Docker running on your system.
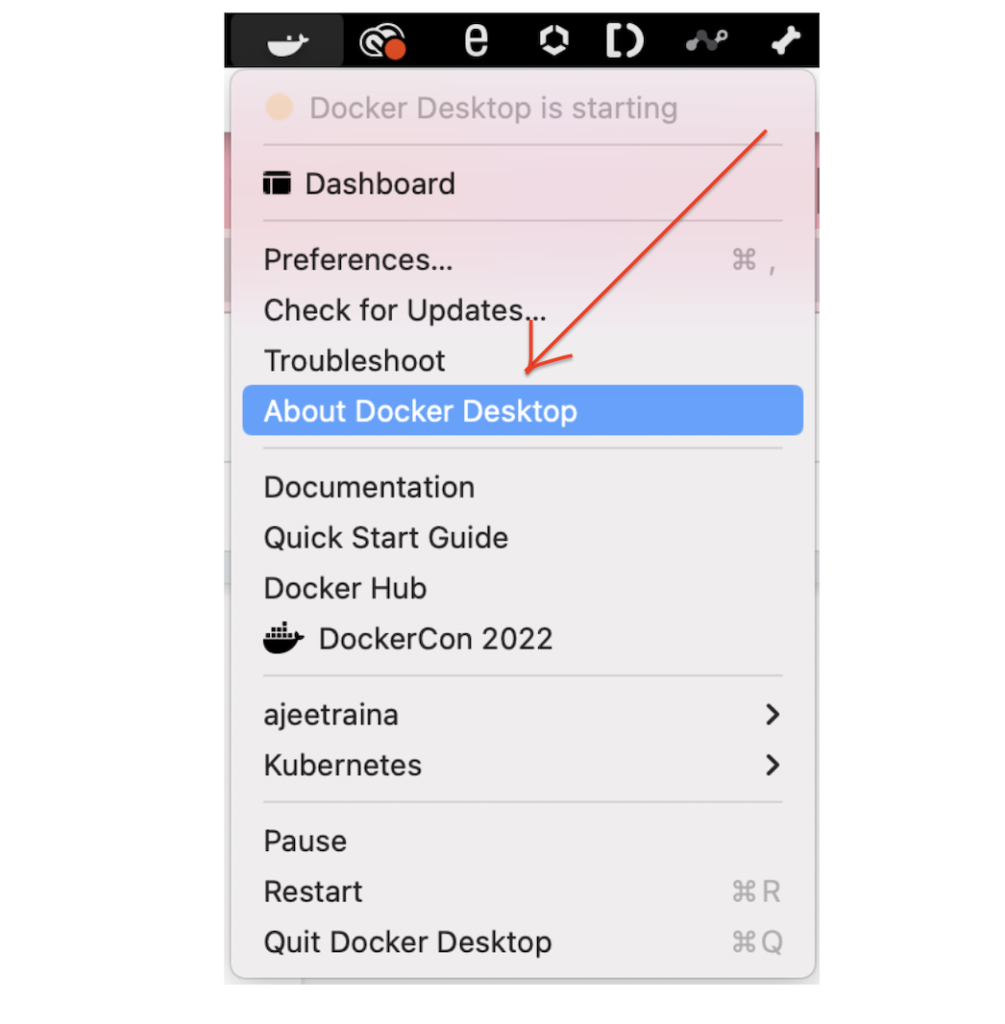
If you follow the above steps, you will always find the latest version of Docker desktop installed on your system.
1. In your terminal, type the following command
dotnet new webApp -o myWebApp --no-https
The `dotnet new` command creates a .NET project or other artifacts based on a template.
You should see the output in terminal
The template ASP.NET Core Web App was created successfully.
This template contains technologies from parties other than Microsoft, see https://aka.ms/aspnetcore/6.0-third-party-notices for details.
This will bootstrap a new web application from a template shipped with dotnet sdk. The -o parameter creates a directory named myWebApp where your app is stored.
2. Navigate to the application directory
cd myWebApp
you will have a list of files –
tree -L 2
.
├── Pages
│ ├── Error.cshtml
│ ├── Error.cshtml.cs
│ ├── Index.cshtml
│ ├── Index.cshtml.cs
│ ├── Privacy.cshtml
│ ├── Privacy.cshtml.cs
│ ├── Shared
│ ├── _ViewImports.cshtml
│ └── _ViewStart.cshtml
├── Program.cs
├── Properties
│ └── launchSettings.json
├── appsettings.Development.json
├── appsettings.json
├── myWebApp.csproj
├── obj
│ ├── myWebApp.csproj.nuget.dgspec.json
│ ├── myWebApp.csproj.nuget.g.props
│ ├── myWebApp.csproj.nuget.g.targets
│ ├── project.assets.json
│ └── project.nuget.cache
└── wwwroot
├── css
├── favicon.ico
├── js
└── lib

8 directories, 19 files
3. In your terminal, type the following command to run your application
The dotnet run command provides a convenient option to run your application from the source code.
dotnet run –urls http://localhost:5000
The application will start to listen on port 5000 for requests
# dotnet run
Building...
warn: Microsoft.AspNetCore.DataProtection.Repositories.FileSystemXmlRepository[60]
Storing keys in a directory '/root/.aspnet/DataProtection-Keys' that may not be persisted outside of the container. Protected data will be unavailable when the container is destroyed.
warn: Microsoft.AspNetCore.Server.Kestrel[0]
Unable to bind to http://localhost:5000 on the IPv6 loopback interface: 'Cannot assign requested address'.
info: Microsoft.Hosting.Lifetime[0]
Now listening on: http://localhost:5000
info: Microsoft.Hosting.Lifetime[0]
Application started. Press Ctrl+C to shut down.
info: Microsoft.Hosting.Lifetime[0]
Hosting environment: Development
info: Microsoft.Hosting.Lifetime[0]
Content root path: /src
4. Test the application
Run the curl command to test the connection of the web application.
# curl http://localhost:5000

5. Put the application in the container
In order to run the same application in a Docker container, let us create a Dockerfile with the following content:
FROM mcr.microsoft.com/dotnet/sdk as build
COPY . ./src
WORKDIR /src
RUN dotnet build -o /app
RUN dotnet publish -o /publish

FROM mcr.microsoft.com/dotnet/aspnet as base
COPY --from=build  /publish /app
WORKDIR /app
EXPOSE 80
CMD ["./myWebApp"]
This is a Multistage Dockerfile. The build stage uses SDK images to build the application and create final artifacts in the publish folder. Then in the final stage copy artifacts from the build stage to the app folder, expose port 80 to incoming requests and specify the command to run the application myWebApp.
Now that we have defined everything we need to run in our Dockerfile, we can now build an image using this file. In order to do that, we’ll need to run the following command:
$ docker build -t mywebapp .
We can now verify that our image exists on our machine by using docker images command:
$ docker images
REPOSITORY TAG IMAGE ID CREATED SIZE
mywebapp latest 6acc7ebf3a1d 25 seconds ago 210MB
In order to run this newly created image, we can use the docker run command and specify the ports that we want to map to and the image we wish to run.
$ docker run --rm - p 5000:80 mywebapp
- p 5000:80– This exposes our application which is running on port 80 within our container on http://localhost:5000 on our local machine.--rm– This flag will clean the container after it runsmywebapp– This is the name of the image that we want to run in a container.
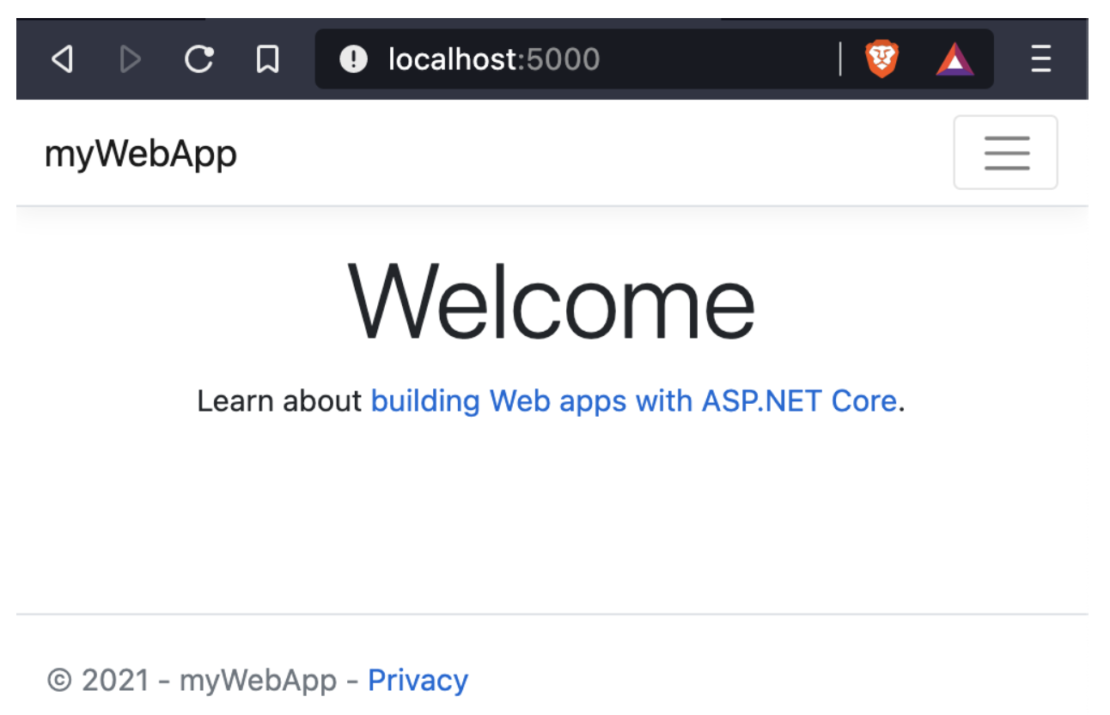
Now we start the browser and put http://localhost:5000 to address bar
Update application
The myWebApp and Postgresql will be running in two separate containers, and thus making this a multi-container application.
1. Add package to allow app talk to database
Change directory to myWebapp and run the following command:
dotnet add package Npgsql.EntityFrameworkCore.PostgreSQL
2. Create student model
- Create a Models folder in the project folder
- Create Models/Student.cs with the following code:
using System;
using System.Collections.Generic;
namespace myWebApp.Models
{
public class Student
{
public int ID { get; set; }
public string LastName { get; set; }
public string FirstMidName { get; set; }
public DateTime EnrollmentDate { get; set; }
}
}
3. Create the `SchoolContext` with the following code:
using Microsoft.EntityFrameworkCore;
namespace myWebApp.Data
{
public class SchoolContext : DbContext
{
public SchoolContext(DbContextOptions<SchoolContext> options) : base(options) { }
public DbSet<Models.Student>? Students { get; set; }
}
}
4. Register SchoolContext to DI in Startup.cs
// You will need to add these using statements as well
using Microsoft.EntityFrameworkCore;
using myWebApp.Models;
using myWebApp.Data;
var builder = WebApplication.CreateBuilder(args);
// Add the SchoolContext here, before calling AddRazorPages()
builder.Services.AddDbContext<SchoolContext>(options =>
options.UseNpgsql(builder.Configuration.GetConnectionString("SchoolContext")));
// Add services to the container.
builder.Services.AddRazorPages();
5. Adding database connection string to `appsettings.json`
{
"Logging": {
"LogLevel": {
"Default": "Information",
"Microsoft": "Warning",
"Microsoft.Hosting.Lifetime": "Information"
}
},
"AllowedHosts": "*",
"ConnectionStrings": {
"SchoolContext":
"Host=db;Database=my_db;Username=postgres;Password=example"
}
}
6. Bootstrap the table if it does not exist in Program.cs
using Microsoft.EntityFrameworkCore;
using myWebApp.Data;

var builder = WebApplication.CreateBuilder(args);

// Add services to the container.
builder.Services.AddRazorPages();
builder.Services.AddDbContext<SchoolContext>(options =>
options.UseNpgsql(builder.Configuration.GetConnectionString("SchoolContext")));
var app = builder.Build();

using (var scope = app.Services.CreateScope())
{
var services = scope.ServiceProvider;
try
{
// add 10 seconds delay to ensure the db server is up to accept connections
// this won't be needed in real world application
System.Threading.Thread.Sleep(10000);
var context = services.GetRequiredService<SchoolContext>();
var created = context.Database.EnsureCreated();

}
catch (Exception ex)
{
var logger = services.GetRequiredService<ILogger<Program>>();
logger.LogError(ex, "An error occurred creating the DB.");
}
}

// Configure the HTTP request pipeline.
if (!app.Environment.IsDevelopment())
{
app.UseExceptionHandler("/Error");
}
app.UseStaticFiles();

app.UseRouting();

app.UseAuthorization();

app.MapRazorPages();

app.Run();
 
Update the UI
Add the following to `Pages/Index.cshtml`
<div class="row mb-auto">
<p>Student Name is @Model.StudentName</p>
</div>
and update `Pages/Index.cshtml.cs` as shown below:
public class IndexModel : PageModel
{
public string StudentName { get; private set; } = "PageModel in C#";
private readonly ILogger<IndexModel> _logger;
private readonly myWebApp.Data.SchoolContext _context;

public IndexModel(ILogger<IndexModel> logger, myWebApp.Data.SchoolContext context)
{
_logger = logger;
_context= context;
}

public void OnGet()
{
var s =_context.Students?.Where(d=>d.ID==1).FirstOrDefault();
this.StudentName =
quot;{s?.FirstMidName} {s?.LastName}";
}
}
Configuration file
The entry point to Docker Compose is a Compose file, usually called docker-compose.yml
In the project directory, create a new file docker-compose.yml in it. Add the following contents:
services:
db:
image: postgres
restart: always
environment:
POSTGRES_PASSWORD: example
volumes:
- postgres-data:/var/lib/postgresql/data
adminer:
image: adminer
restart: always
ports:
- 8080:8080
app:
build:
context: .
dockerfile: ./Dockerfile
ports:
- 5000:80
depends_on:
- db
volumes:
postgres-data:
In this Compose file:
- Two services in this Compose are defined by the name
dbandwebattributes; the adminer service is a helper for us to access db - Image name for each service defined using
imageattribute - The
postgresimage starts the Postgres server. environmentattribute defines environment variables to initialize postgres server.POSTGRES_PASSWORDis used to set the default user’s, postgres, password. This user will be granted superuser permissions for the database my_db in the connectionstring.
- app application uses the
dbservice as specified in the connection string - The app image is built using the Dockerfile in the project directory
- Port forwarding is achieved using
portsattribute. depends_onattribute allows to express dependency between services. In this case, Postgres will be started before the app. Application-level health checks are still the user’s responsibility.
Start the application
All services in the application can be started, in detached mode, by giving the command:
docker-compose up -d
An alternate Compose file name can be specified using -foption.
An alternate directory where the compose file exists can be specified using -p option.
This shows the output as:
ocker compose up -d
[+] Running 4/4
⠿ Network mywebapp_default      Created                                             0.1s
⠿ Container mywebapp-db-1       Started                                             1.4s
⠿ Container mywebapp-adminer-1  Started                                             1.3s
⠿ Container mywebapp-app-1      Started                                             1.8s

0
The output may differ slightly if the images are downloaded as well.
Started services can be verified using the command docker-compose ps:
ocker compose ps
NAME                 COMMAND                  SERVICE             STATUS              PORTS
mywebapp-adminer-1   "entrypoint.sh docke…"   adminer             running             0.0.0.0:8080->8080/tcp
mywebapp-app-1       "./mywebapp"             app                 running             0.0.0.0:5000->80/tcp
mywebapp-db-1        "docker-entrypoint.s…"   db                  running             5432/tcp
This provides a consolidated view of all the services, and containers within each of them.
Alternatively, the containers in this application, and any additional containers running on this Docker host can be verified by using the usual docker container ls command
docker container ls
CONTAINER ID   IMAGE               COMMAND                  CREATED              STATUS                   PORTS                              NAMES
f38fd86eb54f   mywebapp_app        "./mywebapp"             About a minute ago   Up About a minute        0.0.0.0:5000->80/tcp               mywebapp-app-1
7b6b555585b9   adminer             "entrypoint.sh docke…"   About a minute ago   Up About a minute        0.0.0.0:8080->8080/tcp             mywebapp-adminer-1
5ea39a742206   postgres            "docker-entrypoint.s…"   About a minute ago   Up About a minute        5432/tcp                           mywebapp-db-1
Service logs can be seen using docker-compose logs command, and looks like:
docker compose logs
mywebapp-adminer-1  | [Fri Apr 15 12:38:31 2022] PHP 7.4.16 Development Server (http://[::]:8080) started
mywebapp-db-1       |
mywebapp-db-1       | PostgreSQL Database directory appears to contain a database; Skipping initialization
mywebapp-db-1       |
mywebapp-db-1       | 2022-04-15 12:38:32.033 UTC [1] LOG:  starting PostgreSQL 13.2 (Debian 13.2-1.pgdg100+1) on x86_64-pc-linux-gnu, compiled by gcc (Debian 8.3.0-6) 8.3.0, 64-bit
mywebapp-db-1       | 2022-04-15 12:38:32.034 UTC [1] LOG:  listening on IPv4 address "0.0.0.0", port 5432
mywebapp-db-1       | 2022-04-15 12:38:32.034 UTC [1] LOG:  listening on IPv6 address "::", port 5432
mywebapp-db-1       | 2022-04-15 12:38:32.056 UTC [1] LOG:  listening on Unix socket "/var/run/postgresql/.s.PGSQL.5432"
mywebapp-db-1       | 2022-04-15 12:38:32.084 UTC [27] LOG:  database system was shut down at 2021-11-13 22:52:29 UTC
mywebapp-db-1       | 2022-04-15 12:38:32.171 UTC [1] LOG:  database system is ready to accept connections
mywebapp-app-1      | warn: Microsoft.AspNetCore.DataProtection.Repositories.FileSystemXmlRepository[60]
mywebapp-app-1      |       Storing keys in a directory '/root/.aspnet/DataProtection-Keys' that may not be persisted outside of the container. Protected data will be unavailable when container is destroyed.
mywebapp-app-1      | warn: Microsoft.AspNetCore.DataProtection.KeyManagement.XmlKeyManager[35]
mywebapp-app-1      |       No XML encryptor configured. Key {e94371f0-08d1-43a0-b286-255e0005605c} may be persisted to storage in unencrypted form.
mywebapp-app-1      | info: Microsoft.Hosting.Lifetime[0]
mywebapp-app-1      |       Now listening on: http://[::]:80
mywebapp-app-1      | info: Microsoft.Hosting.Lifetime[0]
mywebapp-app-1      |       Application started. Press Ctrl+C to shut down.
mywebapp-app-1      | info: Microsoft.Hosting.Lifetime[0]
mywebapp-app-1      |       Hosting environment: Production
mywebapp-app-1      | info: Microsoft.Hosting.Lifetime[0]
mywebapp-app-1      |       Content root path: /app
Verify application
Let’s access the application. In your browser address bar type http://localhost:5000
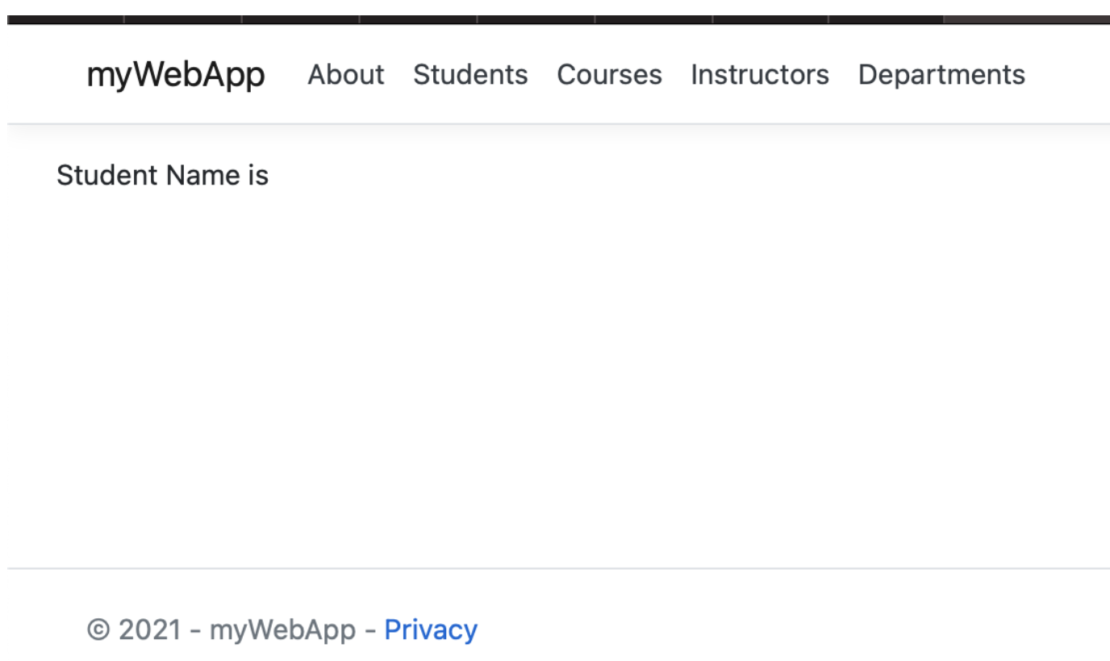
you will see the page show no student name since the database is empty.
Open a new tab with address http://localhost:8080 and you will be asked to login:
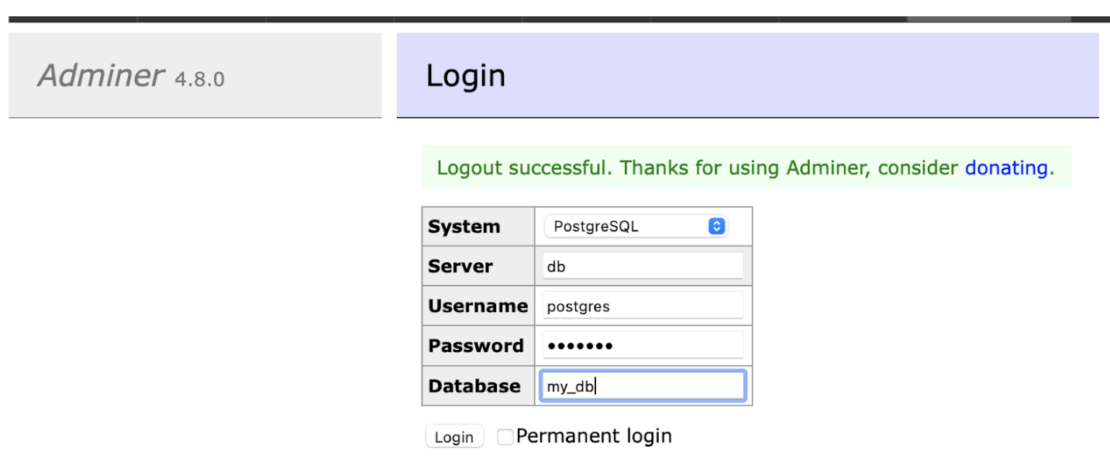
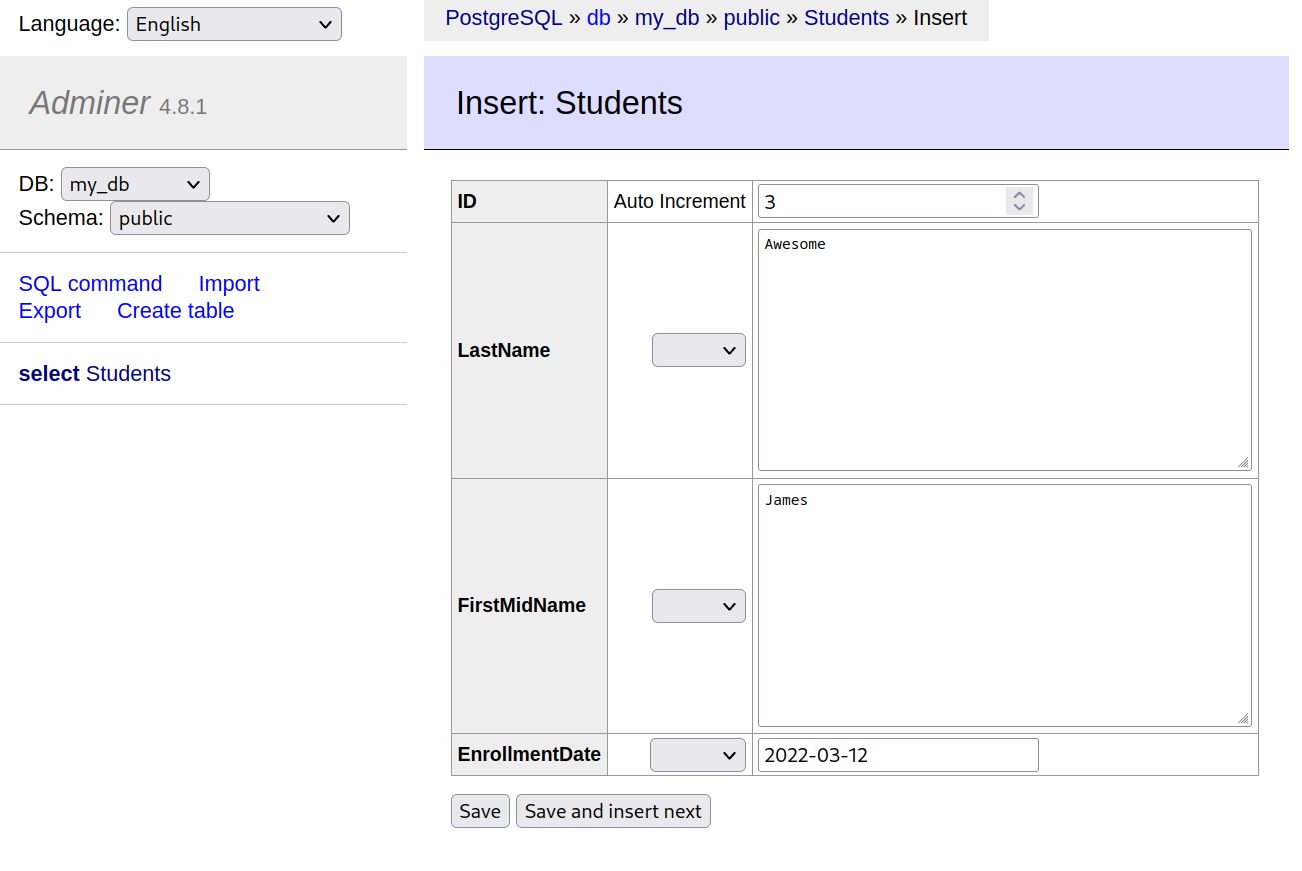
Use postgres and example as username/password to login my_db. Once you are logged in, you can create a new student record as shown:
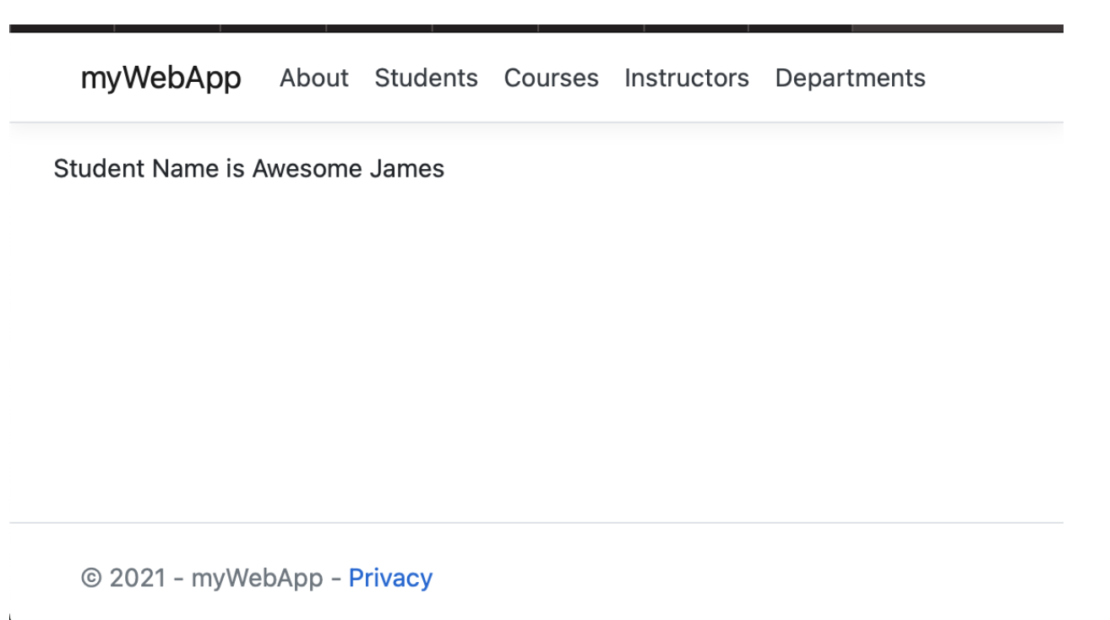
Next, refresh the app page at http://localhost:5000, the new added student name will be displayed:
Shutdown application
Shutdown the application using docker-compose down:
docker compose down
[+] Running 4/4
⠿ Container mywebapp-app-1      Removed                                             0.4s
⠿ Container mywebapp-adminer-1  Removed                                             0.3s
⠿ Container mywebapp-db-1       Removed                                             0.4s
⠿ Network mywebapp_default      Removed                                             0.1s
This stops the container in each service and removes all the services. It also deletes any networks that were created as part of this application.
Conclusion
We demonstrated the containerization of .NET application and the usage of docker compose to construct a two layers simple web application with dotnet. The real world business application can be composed of multiple similar applications, ie. microservice application, that can be described by docker compose file. The same process in the tutorial can be applied to much more complicated applications.
Feedback
0 thoughts on "Building a Multi-Container .NET App Using Docker Desktop"